Sunday, December 29, 2013

Croatian Cinnamon Walnut Swirl Breakfast Bread


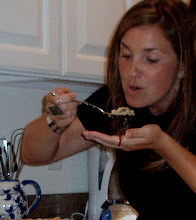
Bread or cake? Who knows. I got this recipe from Saveur and LOVE it. We often had cinnamon bread for breakfast when we were growing up and there's nothing like cinnamon toast soaked with butter. This bread is almost like a pastry and the nuts in the swirl give it a little extra something. It's a fairly hassle-free bread - two rises, each for an hour...

For the dough:
1 1/4-oz. package of active dry yeast
1/4 cup sugar
3/4 cup milk, heated to 115 degrees
1/2 tbsp kosher salt
4 tbsp. butter, melted
1 egg
2 1/2 cups flour

For the filling:
1 cup walnut halves, toasted
1/2 cup sugar
4 tbsp unsalted butter
2 tbsp milk
1 tsp cinnamon
2 egg whites

1. Combine yeast, 1 tbsp sugar, and half the milk in the bowl of a stand mixer with a paddle attachment. Let sit until foamy, about 10 mins. Add the remaining sugar, milk, salt, butter and egg. Blend, then while still blending, add flour and beat until smooth. Cover with plastic and put in a warm place for an hour and doubled in size.

2. Puree the walnuts, sugar, butter, milk, and cinnamon in a food processor until smooth. Beat the egg whites until stiff peaks form. Fold into walnut paste.

3. Grease a 9x5x2.75" loaf pan with butter. On a floured surface, roll dough into 10x4" long oval, about 1/16" thick. It won't be a firm dough - at all. Spread the walnut mixture over the dough, leaving about 1/4" of dough around borders. Starting at the narrow end, roll dough tightly. Trim ends and place in loaf pan. Set in a warm place until doubled in size - 1 hr.

4. Heat oven to 350 and bake until toothpick comes out clean, about an hour.

Thursday, December 26, 2013

Crunchy Roasted Chickpeas

For a girl who never ate a bean until college, I sure do love me some beans. Baked, sauteed, pureed...whatever. I had roasted chickpeas at a restaurant a few years ago, they were served at the table instead of bread and I loved them. I only recently made my own and they're really easy. And a really yummy, healthy snack.

2 cans of chickpeas, rinsed and drained
2 tbsp olive oil
1 tsp cumin
1 tsp cayenne
Salt and pepper to taste

1. Preheat the oven to 450.

2. Pour the drained chickpeas onto a baking sheet lined with paper towels and pat dry. Let them sit for another 15 mins or so - make sure they're dry.

3. Transfer the chickpeas to a bowl and mix with olive oil and your seasonings.

4. Pour the chickpeas back onto the baking sheet and roast for 30-40 minutes, shaking the pan every 15 minutes or so that they're evenly roasted. Make sure they're crunchy before they come out...err on the long side, you don't want them to be mushy or gummy.


Crispy Spiced Chicken Thighs with Hummus and Pine Nut Raisin Relish

Chicken thighs get a bad name. I guess you either like dark meat or you don't, but I happen to love thighs and the extra fat doesn't bother me at all :) This recipe is adapted from Food and Wine and is a flavorful way to dress up another night of chicken. Don't forgo the bones or the skin - you need both to make this crispy and juicy. (You can skip #2 and buy hummus already made...)

1/4 cup olive oil
4 cloves garlic, smashed
1.5 tsp coriander
1 tbsp cumin
1 tsp lemon zest
Salt and pepper
1 lb bone-in, skin-on chicken thighs
1 can chickpeas
1/4 cup tahini
2.5 tbsp lemon juice
1 small red onion, diced
1/2 cup golden raisins, soaked in hot water 30 mins, then drained
1/4 pine nuts, toasted
Small handful of cilantro, roughly chopped
Splash of white wine vinegar
1/2 plain Greek yogurt

1. Combine the first six ingredients in a large bowl. Add the chicken and coat, refrigerate for 4 hours or overnight.

2. In a food processor, combine the chickpeas, tahini, 1 tbsp lemon juice and salt and pepper. Process until smooth and add a little water if it's too thick.

3. Preheat the oven to 450. Heat a cast iron skillet. Remove the chicken from the marinade and scrape off any solids. Add chicken to the skillet, skin side down. Cook over moderately high heat until skin is browned and crispy. Turn the chicken over and put the pan in the oven and roast for 15 minutes or until juices run clear.

4. In a bowl, combine the onion, raisins, pine nuts, cilantro, vinegar, and the rest of the lemon juice.

5. Heat up the hummus so that it's warm - you can microwave it for 30 seconds or so. Place a mound of hummus on the plate, top with a dollop of yogurt, the chicken and the relish.

Sunday, November 24, 2013

Chicken Tortilla Soup

This soup comes from Ree Drummond. Do you ever watch the Pioneer Woman on the Food Network? I swear, this woman is a whole lot of perfection. Always smiling, so easy going, and the food! All on an isolated ranch with a cowboy husband and a handful of kids...who she home schools, by the way. Not sure how this woman pulls it off. I tried her tortilla soup last week and it was delicious - it took us a few days to eat and that was ok with us!

2 whole boneless, skinless chicken breasts 
1 tbsp olive oil 
1 1/2 teaspoon cumin 
1 teaspoon chili powder 
1/2 tsp garlic powder 
1/2 tsp salt 
1 tbsp olive oil 
1 cup diced onion 
3 cloves garlic, minced 
1 can (10 Oz. Can) Rotel tomatoes and green chilies 
3 tbsp tomato paste 
5-6 cups chicken broth 
1 can black beans, drained 
3 tbsp cornmeal 
4 whole corn tortillas, cut into 2 inch strips
1 avocado
Sour cream
Cilantro


1. Preheat oven to 375 degrees. Mix cumin, chili pepper, garlic powder, and salt. Drizzle 1 tablespoon olive oil on chicken breasts, then sprinkle a small amount of spice mix on both sides. Set aside the rest of the spice mix.

2. Place chicken breasts on a baking sheet. Bake for 20 to 25 minutes, or until chicken is done. Use two forks to shred chicken. Set aside.

3. Heat 1 tablespoon olive oil in a pot over medium high heat. Add onions and garlic. Stir and begin cooking, then add the rest of the spice mix. Stir to combine, then add shredded chicken and stir.

4. Pour in Rotel, chicken stock, tomato paste, water, and black beans. Bring to a boil, then reduce heat to a simmer. Simmer for 45 minutes, uncovered.

5. Mix cornmeal with a small amount of water. Pour into the soup, then simmer for an additional 30 minutes. Check seasonings, adding more if needed---add more chili powder if it needs more spice, and be sure not to undersalt. Turn off heat and allow to sit for 15 to 20 minutes before serving. Five minutes before serving, gently stir in tortilla strips.

6. Ladle into bowls, then top with sour cream and diced avocado.

Poulet Yassa

In Senegal, there are a few dishes that you will see on every menu - at restaurants and in homes. Poulet Yassa is an oniony, stewy dish that is glorious over white rice. Everyone makes it a little differently - from light and tart, to an almost sweet, rich sauce in which the onions are caramelized. Either way, crack the windows and put on some goggles.

1/4 cup peanut oil
3-4 bone-in, skin-on chicken breasts
6 onions - halved and sliced
8 tbsp lemon juice
8 tbsp vinegar
1 bay leaf
4 cloves of garlic, minced
2 tbsp dijon mustard
1 tsp soy sauce
1 tsp red pepper flakes
Green olives (optional)

1. In a large dutch oven, heat the oil and brown the chicken on all sides. Remove from pan and set aside.

2. Add the onions to the pot and saute on low to medium heat until soft and translucent - this will take a while and let them cook slowly.

3. Add the remaining ingredients. If too dry - add a little chicken stock but be careful not to make it soupy. Then add the chicken back to the pot and cook with the onions until cooked through.

Serve on white rice or couscous.

Salted Caramel Apple Cake

It's apple season! I made this delicious cake a few weeks ago when Paddy and I visited Reebs and Andy up in Rangeley, ME. It was dessert and breakfast all in one weekend...the best kind of cake. Also great about this cake - the salted caramel sauce. I may have saved a little extra to put on ice cream the following week...

This recipe comes from Pinch of Yum, one of my new favorite blogs.

2 cups thinly sliced apples - slice on a mandolin to get them as thin as possible.

For the sauce:
1/2 cup salted butter
2/3 cup brown sugar
1 tsp cinnamon
1/2 tsp nutmeg
1/4 tsp ground cloves
1 tsp vanilla extract

For the cake:
1/2 cup salted butter
1 cup brown sugar
2 eggs
1/4 cup milk
1 1/2 cups flour
1 tsp baking powder
1/2 tsp cinnamon

Preheat the oven to 325 degrees.

1. Generously grease a round 9-inch baking pan.

2. To prepare the sauce, melt the butter in a medium saucepan. Add the brown sugar, cinnamon, nutmeg, cloves, and vanilla. Keep over medium heat and cook for 3 minutes until smooth and thick. Pour the caramel into the greased cake pan but reserve a little - around 1/4 cup. Layer the apples on top of the caramel.

3. To prepare the cake batter, beat the butter and brown sugar until creamy. Add the eggs and milk and beat to incorporate. Stir in teh flour, baking powder, and cinnamon.  Pour the cake batter on top of the apples.

4. Bake for 45 minutes. Let cool for 10 minutes. Invert onto a plate and tap the top until the cake comes out on a plate. Pour the remaining caramel on top.

Thursday, November 14, 2013

Spicy Sausage Soup

This is one of those recipes that shouldn't even be a recipe. Empty out the crisper drawer in your refrigerator and cover your eyes and pick about 4-5 spices from the cabinet...there's a whole lot of everything in this soup so a substitute here and there definitely won't kill it. It's a great soup for the winter - hearty, full of veggies and with a little heat. It's one of Paddy's favs.

PS - more soup recipes coming soon!!

1 package of ground spicy Italian sausage - remove from casings
1 carrot, diced
1 celery stalk, diced
1 onion, diced
3 cloves of garlic, minced
1 handful of cremini mushrooms, diced
1 zucchini, diced
1 tbsp chili powder
1 tsp cumin
1 tsp coriander
1 tsp oregano
1 tsp red pepper flakes
1/4 cup fresh basil, chopped
1/2 small can of tomato paste
1 14 oz can of fire-roasted tomatoes
1 can chick peas, drained
4 cups chicken broth
1 cup pasta, shells work well

1. Saute the sausage in a dutch oven until completely cooked. Break down into small pieces. Remove from pot and drain most of the fat.

2. Add the carrot, onion, garlic, mushrooms and zucchini and saute until tender.

3. Add the spices and mix well with the vegetables. Add tomato paste and mix well.

4. Add the tomatoes, broth, and sausage and bring to a boil.

5. Add the shells and cook until tender.

Serve with grated Parmesan.

Blue-Barb Jam

I got into making jam because of my Grandma. She was an extraordinary cook and was always up to something in the kitchen. And she went the extra mile. She would heat the maple syrup for our pancakes on mornings after we'd spent the night. She made her own jam. She made horseradish...she made stuff that most people just buy. And so I grew up in a family where buying pie crust was sacrilege. Jam...always homemade. My mom was the same way - blueberry and raspberry jam from the garden in the backyard. Tomato sauce with the over-abundance of tomatoes. And the famed story of the time she and my dad tried to make wine in their younger years...and I think as the story goes, it spilled, there was a lot of sugar...

I'm getting ready to make my annual batch of orange (+ grapefruit as Grandma always did) marmalade. It's become a pre-Christmas thing for me and now Paddy's mom counts on a few jars when goes home for the holiday. But this is a recipe for Blue-Barb jam - it's an end of summer jam, when the rhubarb is out. It's a nice twist on standard blueberry since it adds a little extra tart.

We went through half a dozen jars this summer/fall. It's also great mixed in with plain Greek yogurt, on waffles, in oatmeal...

1 lb rhubarb stalks, cut into 1 inch pieces
1 lb of blueberries
3 cups of sugar
2 tbsp fresh lemon juice
pinch of salt

1. Combine all ingredients in a large saucepan and cook over medium high heat, stirring constantly until the berries have burst and rhubarb is soft. Remove from heat.

2. Mash the rhubarb and berries against the side of the pan, simmer over moderate heat for another 10 minutes or until it's thickened.

3. Pour the jam into jars and refrigerate up to 2 weeks or return to boiling water to seal.

*Makes 4 cups.

Friday, September 13, 2013

Chicken and Veggie Chilaquiles with Poblano Avocado Cream


I love to make chilaquiles because it's a delicious use of leftover meat and vegetables. This 'Mexican lasagna' is a multi-layer flavor extravaganza. I made this tonight with what I had in the fridge and included this new addition of the avocado and poblano cream is based on one of my favorite restaurant meals ever - Besito's Budin de Mariscos with crab and shrimp. On that note, you can pretty much substitute any ingredient in this dish - seafood, veggies, even use corn tortillas instead of flour.

Chilaquiles
1 chicken breast, shredded
1 cup of your favorite salsa (just please friends, no Tostitos)
1/2 package of shredded Mexican blend cheese
1 zucchini, grated and squeezed dry through a paper towel (just make sure its of decent quality)
1 cup of kale, finely chopped
1/2 small onion, diced
3 cloves garlic, minced
5 mushrooms, finely chopped
salt and pepper

Poblano Avocado Cream
2 poblano peppers
1 jalapeno, de-seeded, de-veined
1/3 cup sour cream
2 avocados
2-3 tbsp olive oil
Juice of 1 lime
salt and pepper

1. Preheat oven to 425.

2. Roast the poblanos for about 20 minutes (turn once half way through) or until they start to blister and get soft. Once they cool, remove the stem and all seeds. Turn oven down to 375.

3. Saute the onion and garlic on medium with a bit of olive oil until onions soften. Add the kale and stir frequently until the kale softens. Season with salt and pepper. Pour into a bowl and set aside.

4. In the same pan, saute the mushrooms and set aside. Add the chicken and 3/4 of the salsa. Let it simmer to evaporate some of the juices. Turn off the heat.

5. Spray a deep dish (one you would use for lasagna) with baking spray. Spoon a bit of salsa on the bottom of the dish just to cover. Put down a layer of tortillas. Add some of the chicken mixture to form a layer. Add the mushrooms and then sprinkle some cheese over. Lay more tortillas on top, then more chicken, then the zucchini, and more cheese. Lay more tortillas, more chicken if you have it, then the kale mixture and a little cheese. Lay a final layer of tortillas and spoon the rest of the salsa on top (this will prevent the top layer from getting hard). Sprinkle the remaining cheese on top (and a little extra if you want!). Cover with foil and bake for 30 mins.

6. Meanwhile, in a food processor, add all of the cream ingredients with a good bit of salt and pepper.

7. Spoon about 1/4 cup of the avocado cream on the plate and swirl it with a spoon to spread it out in an even layer/circle on the plate. Serve the chilaquiles on top.
Print Friendly and PDF

Ricotta Omelets with Cherry Tomato Vinaigrette

Eggs are my go-to fast meal, especially for dinner. When I don't have any meat or if I don't feel like cooking, nothing like a frittata with some random veggies or a nice fluffy omelet (made Grandma's way - stay tuned) for protein. This is a great, easy recipe from Bon Appetit. The tomatoes are sooo good and could be used on just about anything. Also, who thought to put ricotta in an omelete? Genius!

Cherry Tomato Vinaigrette:
1 pint cherry tomatoes
3 tbsp olive oil
1 shallot, finely chopped
1 tbsp red wine vinegar
Pinch of salt and pepper
2 tbsp chives, chopped

Omelet:
3 tbsp butter
4 eggs, beaten
Pinch of salt and pepper
4 tbsp ricotta (or make/use your own!!)
2 tbsp Parmesan
2 tbsp fresh basil, chopped
1 tbsp fresh chives, chopped

1. Cut half of the tomatoes in half. Heat 1 tbsp oil in a medium saucepan over medium heat. Add shallot and cook, stirring often and until softened.

2. Add the tomatoes and cook until they release their juices. Mash some of the tomatoes with a spoon. Add 1 tbsp vinegar and the rest of the oil. Season with salt and pepper, add the chives and let cool, slightly.

3. Melt butter in a large skillet over medium heat. Pour in the beaten eggs and cook until almost cooked through, spreading eggs completely over the pan.

4. Top the eggs with the ricotta, cheese, basil and chives. Fold 1/3 of omelet toward center, and fold the other 1/3 toward center.

5. Serve with warm tomatoes on top.

Beef and Broccoli Stir Fry

Wow...June since my last post?! I've been slacking. But actually I've been a little busy with work and lots of travel across the country: AZ, VI (yes, VIRGIN ISLANDS), CT, WV, IN, CA, NE, NC, DC, CO, and NY!)

It's summer! And you all know that we generally stick to simple, easy grilling in the summer. Lots of chicken, corn, and salad. My creative juices haven't been flowing...

So, Paddy's playing a gig up in NH tonight and I'm watching the Sox kill the Yankees again (GO SOX!). It's a good night to hit you with a bunch of new ideas. This beef and broccoli recipe came from a blog called appetiteforchina.com. I looked it up a looooong time ago and made it this summer when we had extra steak tips. This is a good one.

1 lb flank steak, thinly sliced (or leftover grilled tips, like I used)
1 tbsp soy sauce
1 tbsp sesame oil
1 tbsp rice wine
1 tsp cornstarch
2 tbsp canola oil
1 clove of garlic, minced
1 tsp grated ginger
2 large shallots, finely chopped
2 cups broccolini
Jasmine rice (as much as needed)

The Sauce
 1 1/2 tbsp soy sauce
1 tbsp Worcestershire sauce
1 tbsp sesame oil
1 tsp rice vinegar
1 tsp sugar
1 tsp cornstarch
2 tsp chili paste (optional)

1. In a medium sized bowl, combine the soy, sesame, rice wine and cornstarch and stir until the cornstarch is dissolved. Add the beef and marinate at room temperature for 10-30 minutes.

2. In a small bowl, combine all of the sauce ingredients and stir until the cornstarch is dissolved. Set aside.

3. Heat a large pan over high heat. Add a tablespoon of oil and coat the pan. Add the beef and spread so that it's cooking in a single layer. Allow it to sear for just a minute or two, untouched. Give it a quick stir and sear for another minute. Transfer to plate and set aside. (If you're using leftovers, marinate if needed or just throw in at the end to heat through)

4. Put another tablespoon of oil in the pan. Add the garlic, ginger, and shallots and cook for about 30 seconds. Add the broccoli and cook for another minute. Pour in the sauce and continue to cook while stirring for another minute.

5. Return the beef to the pan. Give it a stir.

Serve with rice.

Corn Lovers' Potato Salad

It's corn season! We've been eating it every night. Usually steamed, but often grilled. I love charred, grilled corn. It reminds me of walking through downtown Bamako in Mali after a day at school and going to catch my bus home. Women line the edges of the side streets, crouched down over small charcoal grills, turning their corn over the hot coals. The best kind of snack.

These days, I'll grill up a bunch and bring a cob to work to munch on as a snack. But warning - have floss ready. Getting corn in your teeth is a whole other story when: 1) the corn is black, and 2) you're at work. Awkward smiles at meetings. Trust me folks.

1 bunch or about 1 lb of small baby potatoes, halved
1 tbsp olive oil
1 cup charred corn (shuck the corn and put directly on high heat grill, turn occasionally)
1/4 tsp crushed red pepper
1 cup cherry tomatoes
Salt and pepper
1/3 cup cilantro
1/4 cup grated Parmesan

1. Place potatoes in medium saucepan and cover with water. Boil for 10 minutes or until tender. Drain.

2. Heat a large skilled over medium high heat. Add the oil. Add the potatoes and tomatoes and saute for 2 minutes. Add the corn and cook another minute. Add salt and pepper to taste.

3. Transfer to a bowl and mix in cilantro and cheese.

Vegetable Risotto with Poached Eggs

Ok...confession. I have been putting poached eggs on everything lately. We have them for breakfast but they're been pretty popular on the dinner plate too - on grilled asparagus, over stir fry, with grits (such as this butternut squash and sausage hash), and this risotto is a good one. Never thought of an egg as a meal enhancer but I'm a believer now! (Stay tuned for my chorizo and fried egg tacos...YUM!).

People think that risotto is hard to make or that it takes a really long time. It doesn't. And it's a nice change from pasta and not as heavy as you'd think if you make it with some nice, fresh veggies.

4 cups chicken broth
1 tbsp butter
2 tbsp olive oil
1 leek, white part thinly sliced
1 fennel bulb, chopped
2 cloves garlic, minced
1 cup shitake mushrooms, thinly sliced
1 zucchini, quartered and sliced
1 yellow squash, quartered and sliced
1 cup arborio rice
1/2 cup dry white wine
1 cup peas
1/2 cup fresh basil, chopped
(or any vegetables that you want to use!)
3/4 cup grated Romano or Parmesan cheese
1 tbsp white vinegar
2 eggs

1. In a medium saucepan, heat the broth over medium-high heat and keep hot on the stove.

2. In a large skillet over medium-high heat, add the butter and oil. When hot, add the leeks, fennel, zucchini and squash and cook until soft. Add the mushrooms and garlic and cook until mushrooms are soft.

3. Add the rice and cook for 2 minutes, stirring occasionally so that the rice toasts a little. Add the wine and let simmer and reduce until mostly absorbed/evaporated.

4.Add a ladle of chicken broth and stir occasionally, until almost all liquid is absorbed. Then add another ladle of broth, stir until absorbed, and add more. Continue this process until all broth has been added and all has been absorbed. It should take about 20 minutes or so.

5. Add the peas.

6. Heat about 2 inches of water in a medium saucepan until it boils. Turn down to medium or a veeeery gentle simmer. Add the vinegar. Working with one egg at a time - if you have a small ramekin, crack the egg into the ramekin and then gently transfer egg to water (the ramekin will help the egg stay together). If you don't have one, very gently crack the egg into the water. Let them sit still for about 2 1/2 minutes. Transfer the egg to a plate with a paper towel.

7. Add the cheese to the risotto, give it one last stir and serve with poached egg on top.

Friday, June 21, 2013

Grilled Cilantro Lime Chicken with Poblano Spinach Vinaigrette

We grill chicken A LOT in the summer so I'm always trying to find new ways to jazz it up. This is great and healthy! ...unless of course you're one of those people who don't like cilantro. Did you know that people actually taste cilantro differently? Julia Child told Larry King once that she thought cilantro tastes 'dead.' Bummer for her and the rest of you, but I will no longer blame you for this disability...it's not your fault. Check out this interesting article from the NY Times...

Chicken marinade:
4 tbsp olive oild
4 limes, juiced
2 garlic cloves, minced
4 tbsp cilantro, chopped
pinch of salt and pepper
2 chicken breasts

Vinaigrette:
1 poblano, roasted
1 cup baby spinach, steamed for 2 minutes and water squeezed out
1 clove garlic, minced
1 shallot, minced
1/2 cup cilantro, minced
2 limes, juiced
1 tbsp dijon mustard
3/4 cup olive oil
salt and pepper

1. Whisk marinade ingredients, add chicken and marinate for 30 minutes.

2. Fire up the grill. Grill the poblano so that it's charred on all sides. Remove from heat and remove stem and seeds (or your vinaigrette will be VERY hot!!).

3. Blend the poblano and the rest of the vinaigrette ingredients until smooth.

4. Grill the chicken and serve with the vinaigrette on top.

Corn Risotto with Grilled Shrimp and Salsa Verde

It's almost corn season!! Favorite time of the year for the Martocci's. And although there's no better way to eat corn than off the cob, this is pretty darn yummy. Even better? Stock pile your corn throughout the summer by buying at least 2 extra ears every time you get it. Freeze serving sizes in ziplocks and love it throughout the cold months...we grew up always having 'summer corn' at Thanksgiving - thanks Mom!

Salsa:
1/4 cup water
3 tbsp chopped arugula (for a little bite), spinach, or kale - whatever you've got
3 tbsp chopped mint (keep the rest for mojitos!)
3 tbsp chopped parsley
2 tbsp chopped basil
1 tbsp lemon zest
1 tbsp fresh chopped fresh thyme
2-3 tbsp olive oil
1 1/2 tsp balsamic vinegar
Pinch or two of salt
3/4 tsp anchovy paste (don't skip it)
3 cloves garlic

Risotto:
12 large shrimp
2 tbsp olive oil
2 tsp balsamic vinegar
Pinch of salt and pepper
1-2 shallots
Corn from 2 ears
1 tbsp butter
3 cups chicken broth
1-2 sprigs of fresh thyme
1 bay leaf
1 sprig of rosemary
3/4 cups arborio rice
1/4 grated Parmesan

1. To prepare salsa, put all ingredients in a food processor and pulse until finely chopped.

2. Marinate peeled shrimp with 1 tbsp oil, vinegar, and pinch of salt and pepper. Combine and refrigerate for 1 hr.

3. Melt butter and add stock, thyme, bay leaf and rosemary in a medium sized saucepan on medium heat. Keep at medium heat on stove.

4. Place the shrimp on skewers and fire up the grill. Grill the shrimp until opaque and just done - they'll cook a bit more in the risotto. Set aside.

5. In a large saute pan, add 1 tbsp oil and shallot and cook for a few minutes. Add the rice and stir constantly for a couple of minutes. Add 1/2 cup or ladle of stock to the rice and cook until liquid is almost absorbed, stirring constantly (don't add the bay leaf or sprigs). Keep adding a ladle of stock and letting it cook down, repeating  the process until the broth is used and rice is tender. Stir in the corn and Parmesan.

6. Add the shrimp and stir a couple of minutes more. Serve and drizzle with the salsa.

Sunday, April 14, 2013

Rice and Bean Salad with Lime Dressing


Ok, so maybe not as enticing as a burrito or a plate of cheesy enchis. But this salad is delicious and totally guilt free. I've gotten in the habit of making large grainy salads on the weekends that I can eat for lunch throughout the work week. This is a great one. Cheap, easy and tasty.

1 cup of brown rice, barley or farro
2 cups chicken broth
3/4 can of black beans, rinsed
1/2 can garbanzo beans, rinsed
3/4 cup frozen corn, thawed
1/4 cup chopped cilantro
2 roma tomatoes, diced
1 lime, juiced
2 tbsp olive oil
salt and pepper

1. In a medium saucepan, bring the rice to a boil in the broth. Turn down to low and simmer for 30-40 mins or until broth is absorbed and rice is tender. Take off the heat and let cool.

2. Add the beans through the tomatoes to the rice and mix well.

3. Mix the oil, lime juice, salt and pepper and pour over the rice and beans. Stir well. Will last pretty much as long as you need it to in the fridge (within reason).

Saturday, March 23, 2013

Mom's Blueberry Pie

I know...wrong season. But I just made a blueberry pie last week and had to put this up. Paddy's brother, two sisters, and brother-in-law were here last weekend for a gig and I needed to pull together some good eats for the family. My German brother-in-law loves blueberry pie so I whipped this up for the gang. Whip up a pie you say? Yes! Always make double or triple batches of pie crust and keep it in the freezer for emergencies. We all love a blueberry pie emergency...

3 cups of blueberries (about a quart and a half?)
2 tbsp flour
1/2 cup sugar
Squeeze of a lemon
Zest of a lemon or 1/2 an orange
Dash of cinnamon
Pie crust

1. Preheat oven to 350.

2. Combine the flour and sugar in a bowl.

3. Roll out the dough and place in pie dish. Sprinkle 2 tbsp of the flour/sugar mixture on the pie crust.

4. Add the rest of the flour/sugar mixture, zest, juice and cinnamon to the blueberries. Gently stir.

5. Dump the blueberry mixture into the pie and cover with the other crust. Be sure to put at least four slits in the top of the crust  (1/2 inch slits) to let out the steam while it bakes.

6. Bake for 30-45 minutes or until the crust is golden.

Cauliflower and Herbed Barley Salad

I realize that this doesn't sound terribly exciting...cauliflower and beans? But this is delicious. And I almost always trust Bon Appetit. You could always swap out the dressing ingredients with your favorite dressing. The key is to get nice, brown, roasted cauliflower.

1/2 cup barley
1 tbsp lemon zest
3 tbsp lemon juice
1 tbsp mayo
1 tsp dijon mustard
6 tbsp olive oil
1 head of cauliflower, cut into florets
1 15 oz can of butter beans, rinsed
1/2 chopped parsley
2 tbsp fresh tarragon

1. Cook the barley in water or chicken broth for about 1/2 hour until tender.

2. Whisk the lemon juice, mayo, mustard and 5 tbsp of the oil. Season with salt and pepper.

3. Heat oil in a large skillet and add cauliflower. Cook at medium high until tender and browned on all sides. Season with salt and pepper.

4. Transfer the cauliflower to a large bowl, add the beans, parsley, barley, tarragon and the dressing. Season with salt and pepper. Garnish with the lemon zest.

Sunday, March 10, 2013

Cinnamon Pecan Coffee Cake

I feel like I've tried dozens of coffee cake recipes over the past few years. Why is it always better from the bakery? Any bakery! I finally came across this one in Cooking Light and it's now my go-to. It's got the perfect balance of cinnamon and sugar and comes out incredibly moist. LOVE IT. This can be made in a loaf pan or as cup-coffee-cakes...like Little Debbie ;)

Streusel
1/3 cup packed brown sugar
1/3 cup rolled oats
1 tbsp flour
1/4 tsp cinnamon
 Dash of salt
2 tbsp butter, melted
2 tbsp chopped pecans - must toast! Put on stovetop for 5 mins or so on medium.

Cake
2 cups flour
1/2 tsp baking soda
1/2 tsp baking powder
1/2 tsp salt
5 tbsp butter, softened
2/3 cup sugar
3 eggs
1 tsp vanilla
1 cup buttermilk

1. Preheat oven to 350.

2. Combine the struesel ingredients and set aside.

3. In a bowl, combine the first 4 ingredients and mix well. In a large bowl, combine the butter and sugar and beat on medium-high until well blended. 

4. Beating at low speed, add the flour mixture and buttermilk alternately, beginning and ending with the flour mixture. Beat until just combined.

5. Scrape half of batter into a 9x5 loaf pan coated with baking spray. Sprinkle half of the streusel mixture over the batter. Pour the rest of the batter on top and sprinkle remaining streusel on top.

6. Bake for 50 minutes. 

Print Friendly and PDF

Sunday, March 3, 2013

Whole Wheat Pita Bread


I never knew how the heck pita bread turns out hollow. And...I still don't. It's amazing, even after making it. And making pitas is very easy! I've been making these a lot since I've been on a bit of a bread roll (so to say) since getting my shiny Kitchen Aid mixer back in November. The equipment certainly helps here, otherwise, you'll end up with a much larger right bicep really soon...

1 tbsp active yeast
1 1/2 cups warm water
1 tsp salt
1 3/4 cups whole wheat pastry flour (found in grocery store (surprisingly) - look in organic grains section
1 3/4 cups all-purpose flour

1. Dissolve yeast into water for 5 minutes in the mixer bowl.

2. Add the salt and 1/2 the flour. Knead with your dough hook on medium low until incorporated.

3. Add the rest of the flour and knead for another 8 minutes.

4. The dough will be sticky so flour your hands and all surfaces, and the dough itself. Break the dough into about 10-12 balls, flour them and roll them with your hands. Then, roll out each ball to a thin ~5-6 inch disk.

5. Place each disk on a floured baking sheet as you go. Let the rolled dough sit for about 30-40 minutes.

6. Preheat the oven to 425. Flip each dough disk. Place in oven and bake for 10 minutes or so.

Print Friendly and PDF

Butternut Squash and Mushroom Tart with Gruyere

I know, lots of butternut squash stuff lately. But if you buy it, better have a couple of uses on hand because there's always a lot of it!

So I find meat pretty necessary in every meal...have you noticed? I'm not usually drawn to vegetarian delights, although I do love vegetable. I just find myself saying, this would have been better with chicken, or beef, or lamb, or BACON. But I was very pleasantly surprised by this butternut pie from Cooking Light. The great thing about it too, is that you can eat it as your entree or as a side with grilled or broiled meat. This is packed with flavor! Also - the crust is a super easy olive oil-based pie crust that I was pretty amazed with. You could also use store-bought pie crust (god forbid) or homemade pie crust.

Crust
1 cup plus 2 tbsp all-purpose flour
1/4 tsp salt
1/4 tsp black pepper
1/4 tsp baking powder
1/4 cup olive oil
3 tbsp ice water

Filling
3 cups cubed butternut squash
2 tbsp olive oil
3/4 cup chopped onion
1 cup shredded Gruyere
2 eggs
1/2 tsp black pepper
1 1/2 oz chopped pancetta (could sub bacon here)
5 oz slice shitake mushrooms (shitakes are key! Don't sub)
1/4 cup white wine

1. Preheat oven to 450.

2. For crust, combine flour, salt, pepper, and baking powder in a food processor. Pulse a couple of time or until combined. Combine oil and water and slowly pour through food chute and pulse until dough is crumbly.

3. Coat a 9-inch pie plate with cooking spray and press dough into the dish and up the sides. Place in the oven and bake for 10 minutes.

4. For filling, place squash in food processor (no need to clean from dough) and pulse for 1 minute or until finely chopped.

5. Heat a large pan to medium high. Sautee the onion for a minute and then add the squash. Saute for 10 minutes or so, stirring occasionally.

6. While squash cooks, combine half the cheese, eggs, salt and pepper in a large bowl. Stir in the squash and onion mixture.

7. Remove crust from oven, spoon squash mixture over crust and spread evenly. Return to oven and bake for 10 mins.

8. While tart bakes, bring the pan back to medium high. Add a little olive oil and the pancetta and cook for a couple of mins until it starts to brown. Add the mushrooms and cook until browned. Season with salt and pepper. Add wine and cook for another minute or until it almost evaporates.

9. Remove tart from oven. Sprinkle the mushroom mixture over the top and sprinkle with remaining cheese. Return tart to oven and bake for another 5 minutes or until cheese melts.

Print Friendly and PDF

Butternut Squash Ravioli - The Easy Way!

When I make pasta, it's an all day affair that usually ends with my kitchen looking like it was just flour bombed. It's an intense, messy job but always worth it once you get to eat it. I make huge batches and freeze it so that the enjoyment at least lasts for a few months.

But sometimes I want it without the hassle, and wontons are are a great way to make ravioli. Wonton ravioli are quite a bit lighter and much better with a veggie filling and a light sauce because they don't hold up too well in your usual tomato sauce. This is from Cooking Light a few months ago and is a great way to use leftover butternut squash (have you ever noticed that when you buy butternut squash you have way too much of it?). These ravioli are best with fresh baby spinach pesto. These will melt in your mouth!

1 butternut squash, cut into 1 inch pieces
1 tbsp fresh oregano
2 tbsp butter, melted
1 cup of grated parmesan, divided
salt & pepper
1 package of wonton wrappers (found near tofu in grocery store)
1 egg, beaten

1. Preheat oven to 400. Place squash on cookie sheet, drizzle with olive oil and season with salt and pepper. Bake for 20 minutes or until the squash is tender.

2. Remove squash from oven and mash. Add the oregano, butter, and cheese.

3. Moisten 1/2 the edge of the wonton with egg and place 1 1/2 tsp of squash in the middle of the wonton. Fold over and seal. Place wontons on a cookie sheet lined with wax or parchment paper as you finish the rest.

4. Bring a large pot of water to a boil. Carefully place the ravioli in the pot and cook for about 3 minutes. Drain and carefully mix with pesto, a brown butter and sage sauce or a drizzle of olive oil to finish.

*These freeze well! Make a big batch and store in a large tupperware container - just be sure to place parchment between each layer so they don't stick to each other. Put them in boiling water straight from the freezer - they're better if you don't thaw. Print Friendly and PDF

Baby Spinach and Basil Pesto

I love pesto - there's so much you can do with it! It's great on sandwiches, as a condiment with steamed or grilled vegetables, as a soup flavor finesser, with eggs, on pizza...the list goes on. But sometimes I find traditional pesto a little intense...which lead me to this baby spinach version which I actually prefer now. The spinach lightens it up a little and actually gives the pesto much more volume - you get so much more!

*Note to chef - my recipe here does not include garlic, by the way. I find raw garlic a little overpowering which seriously disappoints my dear husband who eats garlic cloves as a snack. I smell like it for days so, no thanks. Feel free to add it. Also several other variations noted below.

Easy to double this recipe - it freezes well. Freeze in a container or in an ice cube tray for easy re-use!
1 1/2 cups baby spinach
1/2 cup fresh basil
1/4 cup walnuts, toasted (substitute pine nuts)
1/2 cup grated Parmesan or finely shredded Romano, Asiago or any other Italian hard cheese
2 tbsp olive oil
2 tbsp veggie or chicken broth

1. Place the nuts in a pan on the stove top and heat on medium high, turning occasionally, until they are browned slightly and are fragrant. Remove from heat.

2. Place the spinach, basil, nuts, cheese, and garlic in a food processor.

3. Combine the broth and olive oil in glass or measuring cup. Pulse the ingredients while drizzling the broth/oil through the food chute. Print Friendly and PDF

Sunday, January 27, 2013

Rajmah - Sara's Indian Chili


So I guess I'm on a bit of a bean kick here. We were over at our friends Sara and Kiran's house not too long ago celebrating Sara's (a different Sara) birthday. Kiran's family is Indian so we were pretty sure that we'd be treated to some Indian deliciousness. Ironically, the Saras made this, not Kiran. Paddy and I were blown away at the flavor...I was even more surprised when Sara sent me the recipe and I realized how EASY it is!!

1/4 cup chopped fresh ginger
1 medium onion, finely chopped
1 tomato, diced
3 cloves garlic, minced
1 large green chili, chopped (optional)
1/2 tsp salt
1 tsp ground cumin
1 tsp ground coriander
1/2 tsp cumin seeds
1/2 tsp ground tumeric
1/4 teaspoon cayenne (double if you don't use green chili)
8 oz can of tomato sauce
1 cup chicken broth
3 cups boiled red kidney beans or 30 oz can of red kidney beans, undrained
1/2 cup chopped fresh cilantro

1. Heat a couple of tablespoons of olive oil in a deep saucepan. Add ginger, garlic, onion, green chili and let sizzle for one minute. 

2. Add the tomato sauce, salt and remaining spices and cook for an additional five minutes, stirring frequently. 

3. Add the kidney beans with water or canned red kidney beans (undrained) plus 1 cup of water, and tomatoes. Bring it to a boil, then reduce to medium heat and let cook uncovered for 10 minutes. Remove from heat. Garnish with cilantro.

4. Serve over rice or with naan. A dollop of plain yogurt on top is heavenly.
Print Friendly and PDF

Monday, January 21, 2013

Over the Top Potato (and Cauliflower) Soup


My husband is Irish. He loves potatoes. He likes them boiled whole, in their skins. He likes them served on a side plate and he carefully peels the skins and eats them like they're chocolate. I definitely don't love potatoes as much as he does. I do try to make an effort to make them, but it often means mashed, fried, hassleback, or, SOUP. And, par for the course, this potato soup has some extra ingredients that jazz up the potato quite a bit. So much so that this soup got Paddy's ultimate 5-star rating of "Spectacular Bacular!"

*This recipe calls for bacon. I'm very sorry for those of you who do/cannot eat bacon for this is the most important ingredient of this soup. Thick cut is best. Note the two options in #1. I always keep a ramekin of bacon fat in my fridge and use it instead of oil or butter when the occasion calls for it. Great for added flavor in this soup and makes for some really yummy eggs. Obviously, not the best option for daily cooking :)

1 onion, diced
1 clove garlic, minced
2 carrots, diced
2 celery stalks, diced
2 russet potatoes, peeled, diced
32 oz chicken broth
A few sprigs of thyme
2 bay leaves
1 cup milk
2 tbsp flour
1/2 head of cauliflower florets
1/4 cup sour cream
3 slices of bacon
1/2 cup shredded cheddar cheese
Bunch of chives, finely chopped

1. Preheat the oven to 450. Line a cookie sheet with foil.

2. Cook the bacon a large dutch oven. Remove and leave at least 2 tbsp bacon fat in the pan. Alternatively, you can skip this step but use bacon fat instead of oil to fry the veggies. Add the onion, garlic, carrots, celery, and potatoes to the pot and let soften for about 10 minutes, stirring occasionally.

3. Mix the cauliflower florets with a bit of olive oil and salt. Place on the cookie sheet and bake in the oven for 30 mins or until lightly browned.

4. Add the chicken broth to the pot with the thyme and bay leaf. It should just cover the veggies, add more if needed. Bring to a boil and then turn it down to medium to simmer.

5. Mix the milk and the flour in a small bowl and add to the pot. Stir well.

6. When cauliflower is done, remove from oven and place in a blender with about 3/4 of the soup. Be careful not to fill your blender to high and use a towel instead of the cover. Blend until smooth.

7. Add the blended soup back into the pot with the chunky soup, add the sour cream and mix well.

8. Serve with a pile of bacon, shredded cheddar, and chives on top.


Print Friendly and PDF

Smokey Homemade Baked Beans

Ok, I know what you're thinking...BAKED BEANS? Yup! Something rarely not eaten out of a can but I can assure you, a little extra effort is worth it. I saw this recipe on The Bitten Word, one of my favorite food blogs. They got it from Saveur. These beans are pretty awesome. As awesome as a bowl of beans could be. This is good for a long cold Sunday because while relatively hassle free, they do take a bit of time (6 hours). Your house will smell glorious...until about an hour after you eat them. So it's a good thing there's plenty of delicious aroma to mask the frightful tooting that will ensue.

We paired the beans with some grilled brats and it was glorious.

1 lb dried navy beans
1 medium yellow onion, ends trimmed, left whole
4 whole cloves
8 oz bacon, cut into 1/4" slices
1/4 cup plus 2 tbsp maple syrup
1/4 cup molasses
2 tsp dry mustard powder

1/2 cup ketchup
1 tbsp cider vinegar
1 tbsp dark rum, if you have it
salt and pepper to taste

1. Bring the beans and 10 cups of water to a boil in a large dutch oven over high heat and cook for 2 minutes. Remove from heat, cover with a lid and let sit for 1 1/2 hrs. Drain the beans.

2. Heat oven to 250.

3. Place the beans back in the dutch oven.

4. Stud the onion with the cloves and place in with the beans along with the bacon, syrup, molasses, dry mustard, and 3 cups of boiling water. Stir to combine.

5. Cover pot and place in the oven. Cook for 3 hours, stirring occasionally.

6. Stir in ketchup and vinegar. Cover again and return to oven for another 3 hours.

7. Stir in rum, season with salt and pepper.
Print Friendly and PDF

Lemon Earl Grey Bars

I have to admit, I'm not usually a big fruity/citrusy dessert person. If I'm gonna indulge, I usually want chocolate. I tried these squares over the summer and was pleasantly surprised. I loved them and so did the gang at the office. This recipe is from Cooking Light and it's a twist on an old classic.

Crust:
1 1/4 cups all-purpose flour
1/3 cup powdered sugar
2 tea bags of Earl Grey, divided
1/8 tsp salt
8 TB chilled butter cut into pieces

Filling:
1/4 cup fresh lemon juice
1 cup granulated sugar
2 TB all-purpose flour
1/2 tsp baking powder
2 tsp lemon zest
3 eggs
1 TB powdered sugar

1. Preheat oven to 350.

2. To make crust, line an 8" baking dish with foil that extends 2" beyond the sides. Coat foil with cooking spray. Combine the flour, powdered sugar, 1 tsp tea, and salt in a bowl. Cut in butter until mixture resembles a course meal. Press into bottom of dish and bake at 350 for 19 minutes or until lightly browned.

3. To prepare filling, microwave lemon juice on high for 30 seconds. Add remaining tea bag to juice and steep for 10 minutes. Squeeze tea bag dry and discard.

4. Mix the sugar, flour, baking powder, zest and eggs and add to the sugar mixture. Whisk until well combined.

5. Remove crust from the oven, pour filling onto hot crust and bake for 23 minutes or until set.

6. Cool pan on a wire rack for 30 minutes. Remove from dish by lifting the tin foil. Sprinkle with powdered sugar.


Print Friendly and PDF