Thursday, December 27, 2012

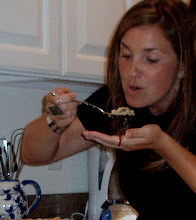
Kettle Corn - at home!


Cover your eyes!

I know, the idea of being able to make Kettle Corn at home is quite scary...for me it's disastrous. Craft fairs, football games, festivals - I wander them until I find the guy with the large homemade smoking steel vat. The glutton that I am, I always go for the biggest size. By the time I've OD'ed, I'm elbow deep in the long plastic bag and wishing I'd never see the stuff again. I'm now prohibited from buying it at Sox games - apparently Paddy can't handle my manic switch from utter glory to desperate sickness. Happens every time.

Ok, now peek through your fingers - here's how amazingly easy it is. I've long been a popcorn-on-the-stove maker - the microwave stuff is just too gross, sorry. This is a nice treat and a break from the usual.

1/2 cup popcorn
3 tbsp of canola oil or enough to lay a thick coating on the bottom of your medium sized pot
1/4 cup sugar
2 tbsp salt

1. Heat a medium sized pot and the oil over medium high heat.

2. Once hot, pour in the popcorn and the sugar. Put a lid on it. Give it a couple of good, hard shakes immediately.

3. Set back down on the stove and let it sizzle for 10-15 seconds with the top ajar. Close the lid and shake it again. Continue until the popcorn is popped.

*Once it stops popping - immediately pour it into a bowl and sprinkle the salt. If you leave it in the pot and/or on the stove, the sugar will caramelize and you'll have a big mess to clean up.

PS: I just at the whole bowl ;)

Print Friendly and PDF

Saturday, December 22, 2012

BBQ Chicken Tacos with Blue Cheese Slaw

You all know I abuse the taco. If it can be squeezed into a tortilla, I'll try it. Here's a perfect example and these are actually great as tacos or on buns - as sliders would be great! I came across this recipe over the summer when I was helping my dear friends Kel and Chad 'use up' some of their CSA veggies. Little Hazel had just entered the world and she required much more attention than the produce. Thing is, there was a lot of it...and lots of eggplant and cabbage - not my strong points. But I wanted to make them some stuff that could sit in the fridge for a few days and be easy and quick to assemble when they needed it. These are delicious and a jazzy twist on what's often the same ole coleslaw.

For the Chicken:
You can do just about anything here. Grilled and shredded chicken works great. Or taken off a roast (roasted at home or one of the lil roasts you can buy already cooked at the store), or even boiled and shredded chicken (if you have to).

The key is a good BBQ sauce. From the bottle (yes, I know, shocking - I do buy a packaged sauce once and a while and this is worth it) Sweet Baby Rays is my favorite. But, making your own is even better - so check out this great recipe for Texas BBQ Sauce from an earlier post (and make those coffee rubbed burgers - they've been buried in the blog and need to be resurrected.)

Either way, have enough on hand for the number of people you need to feed.

For the Slaw (good recipe to cut in half but then again, you'll have the rest of the cabbage, so...):
3 cups green cabbage
3 cups red cabbage
2 cups carrots
3/4 cup mayo
1/2 cup sour cream
3 tbsp grainy mustard
1 tbsp apple cider vinegar
1/2 blue cheese crumbles
1 tbsp parsley
1/2 tbsp oregano
salt and pepper

1. Shred the cabbage and carrots using your food processor. Or, for a finer consistency (which I prefer), put the cabbage in the food processor and pulse a few times or do half and half.

2. In a separate bowl, combine the remaining ingredients and mix. Pour over the cabbage/carrot mixture and stir together.

3. Cover with plastic and let sit for at least 2 hours in the fridge so that the flavors blend together.

4. When ready to eat, heat a large pan to medium. Toss in the chicken to heat it up a bit and mix in the BBQ sauce so it all gets nice and hot and saucy.

5. Heat your tortillas or buns, load 'em up and top with a good bit of the slaw. You'll never make coleslaw any other way again.

Print Friendly and PDF

Fried Rice with Chinese Sausage

I love fried rice. I don't know whether it's the MSG or some other kind of supernatural ingredient or drug that Chinese restaurants put in it but it's like crack. Right? Just when you think you can't have any more...you always go back. Even the next morning, when it's cold in the fridge - it's there and you have to have it. Problem is, it usually leaves me with a serious stomach ache and too much guilt to handle. So I've been searching for a recipe to recreate that crackness at home. It's hard to achieve. But - Chinese sausage really helps. I'd never bought it or cooked it until last week and it's actually pretty easy to find in most grocery stores. I'm 100% hooked. You gotta try this recipe.

Here's the kicker - I adapted this recipe is from Brian Boitano. Yes, you heard me. The skater. Go figure ;)

1/4 cup canola oil, divided
2 eggs, lightly beaten
1 shallot, finely diced
1 tbsp chopped ginger
1 tbsp chopped garlic
1 cups bok chok, finely diced
1/3 cup peas, still frozen or just thawed
2 links Chinese sausage, sliced or diced
3 green onions, chopped 
2 cups cooked white rice
2 tbsp soy sauce
2 tsp rice wine vinegar

*There are a couple ways to do this - use leftover rice, or cook the rice and sausage when you make this. A technique that I found popular is to cook the rice and when it's got about 5-10 minutes left to steam, put the sausage slices (uncooked) on top of the rice and let them steam together. This cooks the sausage and allows the flavors to infuse the rice. It's yummy.

1. Heat 2 tbsp of canola oil in a wok or large pan over high heat. Add the beaten eggs and fry until just cooked. Transfer them to a plate.

2. Add the remaining oil, shallot, ginger, garlic, and bok choy and stir fry for a couple minutes.

3. Add the sausage (if not cooking over rice), the peas and green onions. And cook until sausage is cooked through.

4.  Add the rice, soy sauce, and rice wine vinegar. Stir fry until rice is hot (if using leftover rice).

5. Stir in the egg and serve.

Print Friendly and PDF

Wednesday, October 31, 2012

Smokey Butternut Hash with Poached Eggs and Gouda Grits

Have I mentioned that my mom is the queen of leftovers? I think I have. She's the master of scraps and often says that her best stuff comes from the bits and pieces from days past. Well, perhaps the apple didn't fall too far from the tree. This was dinner last night and was one of my favorite scrappy meals yet. The best part about it - you could have this for breakfast, lunch, or dinner. And you could substitute just about any of the ingredients depending on what's in your fridge/freezer (see suggestions below). Paddy loved this. Last night he asked, "what's this called?" - I call it cleaning out the fridge.

4 eggs
1/2 cup grits
2 cups chicken broth
2 cups butternut squash, diced (small dice)
1 cup  shitake mushrooms, chopped
3 strips of cooked bacon, chopped
1 sausage link - either out of casing or chopped - I used leftover andouille, Italian or chorizo would be good!
3 sage leaves, chopped (any fresh herbs would be good)
1 tbsp thyme, chopped
1/2 cup shredded smoked gouda - could use any cheese
1 tbsp white vinegar
Salt

1. In a medium pan, cook the bacon and sausage with a little olive oil over medium high until a bit crispy and some of the fat is rendered. Add the shitakes and herbs and butternut squash. Stir occasionally so that the sausage doesn't burn and the squash and mushrooms get soft. Salt and pepper to taste.

2. In a large, wide bottomed pan, bring enough water to a boil for the poached eggs. Reduce heat to a simmer.

3. In a medium pot, add the broth and grits and bring to a boil. Turn down so the grits simmer and stir frequently for about 5 minutes.

4. Add the vinegar to the pot of water and using a small ramekin, add each of the eggs gently. They should only take 3 minutes. Carefully remove eggs when done and drain on a plate with a paper towel.

5. Add the shredded cheese to the grits and stir to melt.

6. Serve in a large bowl with grits on the bottom, eggs on top and hash around the sides.
Print Friendly and PDF

Sunday, October 21, 2012

Chicken Biryani

Let me start by saying that when I started searching for a good biryani recipe, I quickly realized how serious this stuff is. You take so much for granted when you eat out - especially Indian food. I love it but I don't make it that often. You gotta have a stocked spice collection for this and if you don't, it's a good excuse to go out and buy some spices that you should  have. This takes a while but sometimes a good long cook is what the soul needs. Just make sure to open your windows...

PS - don't be alarmed by the number of ingredients - this serves about 4-5 people and is great for leftovers.

7-8 onions (very thinly sliced and deep fried until light brown - DON'T skip this step)
10 cashews, fried in a little clarified butter (recipe for clarified butter below)
4 - 6 skinless chicken thighs, quartered
1 cup plain yogurt
2 tsp garlic paste
2 cups basmati rice (washed and soaked in salted water for at least 30 mins)
4 tbsp oil and oil for frying the onions
2 cinnamon sticks
4 cloves
4 cardamom pods
3 bay leaves
1/4 tsp caraway seeds
4 large tomatoes (finely chopped)
1/4 tsp mace powder
1/4 tsp nutmeg
1 tsp coriander
1 tsp chili powder
1/2 tsp tumeric
2-3 chopped green chilis (or you can use sambal for heat)
1 tbsp ginger, chopped
1 tbsp garlic, chopped
1/2 cup milk
pinch of saffron
4 tbsp clarified butter
2 cups cilantro, chopped

1. Marinate the chicken in the yogurt, garlic paste and a pinch of salt for about 8 hours.

2. Heat oil in a dutch oven and fry the onions, separating with your fingers as you put them in. Keep stirring the onions as they fry so that they get evenly browned. Be careful not to have oil too hot - you don't want to burn them on the outside. Remove onions and set aside on a paper towel. They will crisp up once they cool. Drain most of the oil from the pot.

3. Boil the rice in a large pot - it's a lot of rice so use a big one! Put lots of water in the pot - you'll cook the rice like pasta. Also put in 1 cinnamon stick, 4 cloves, 2 cardamom pods, 1/4 tsp caraway seeds and salt. Boil for about 5-7 minutes or until rice is al dente. Be careful not to over cook - it'll cook more later. Drain rice and spread it on a cookie sheet to let cool.

4. In the dutch oven, add the bay leaves, and remaining cloves, cinnamon and cardamom. When they crackle, add the ginger, garlic and chiles. Saute for a minute and add the chicken and marinade. Cook until the liquids dry up.

5. Add the tomatoes, 1/3 of the fried onions, all of the powdered spices, salt and cook until the juices from the tomatoes evaporates. The chicken should be just cooked and most/all of the juices gone. Turn off the heat and set aside.

6. Warm the milk and add the saffron so it turns yellow.

7. In a deep, heavy-bottom pot (important to avoid burning) with a lid, spread some clarified butter. Then put a layer of rice, and a layer of chicken. Sprinkle a generous handful of cilantro and fried onions.  Repeat the layers and have rice be the top layer. Sprinkle remaining onions and all of the cashews over the top.

8. Pour the saffron milk on top using a spoon, evenly covering the whole area.

9. Cover the pot with foil and put the lid over it. Cook on very low heat for 45 minutes.

Clarified Butter
Heat 1 stick of butter over medium low. When melted, take off the heat and let sit until the butter settles and a translucent layer forms on top. Carefully spoon out the translucent layer and discard the rest.


Print Friendly and PDF

Grilled Vegetable and Rice Salad with Herby Vinaigrette

I'm on a roll with brown rice these days. I actually don't like it in hot food though. If I'm gonna have rice, I want it as white and sticky. Plus, you can't beat the flavors of basmati and jasmine. However, I started using brown rice a lot this summer as a "filler" in salads...meaning, I need more than just vegetables for lunch if I'm gonna make it through the day without gnawing on my desk. Turns out, this is a great role for brown rice. This salad is based on a recipe from Bon Appetit. You can use any herbs that you have but this combo is quite good!

Vegetables
12 okra pods (yes, you can skip it and use another veggie but grilled okra is actually quite good!)
3 ears of corn, shucked
1 large zucchini, cut lengthwise in 1'' slices
2 long chiles (Anaheim are good) stemmed
1 small eggplant, cut lengthwise in 1" slices
1 tbsp sea salt

Dressing
1 garlic clove, minced
1 tsp brown sugar
Juice of 1 lime
1 cup or so of fresh herbs (tarragon, mint, basil, cilantro)

1 cup brown rice

1. Cook the brown rice and set aside to cool.

2. Mix the vegetables with a drizzle of olive oil and salt. Grill on high heat until softened a bit and lightly charred. Place the chiles in a bowl with plastic wrap and let them steam to loosen the skins. Peel and discard the skins and take out the seeds. Let all of the veggies cool and chop into chunks.

3. Put the dressing ingredients in a food processor with a drizzle of oil. Blend until you have a pesto consistency.

4. Mix everything together and put in the fridge!


Print Friendly and PDF

Monday, October 8, 2012

Chicken and Butternut Tagine

Reebs was here for a visit this weekend! Among a million other things that we amazingly squeezed into two short days, we popped by Rustica for a chat with Farouk, Amar, and Amed - our pals from the cafe across the street from our old apt on Beacon St. We talked to Farouk for a nice, long while - he was full of smiles and positivity as always. He talked a bit about his last visit home, to Algiers, and I asked him about what he likes to eat when he's there. He talked about tagine...It happened to be the first cold day of autumn here and nothing sounded better than a long, slow cooked North African stew. I've made this many times before, and actually had another recipe on the blog but this is WAY better. It's one to try in the fall weather - and your house will smell glorious. This is adapted from a Food and Wine recipe. It's a 2 hour cook, but the prep and initial cooking time will only take about 15 minutes!

1 lb chicken thighs, quartered
4 cloves garlic, minced
2 tsp ground ginger
2 tsp sweet paprika
2 tsp coriander
1 tsp cumin
1 tsp black pepper
1/4 tsp cayenne
1/4 tsp cloves
Pinch of saffron threads, crumbled
1 onion, diced
1/2 lb butternut squash - save yourself and get the pre-cut stuff from the store. They should be 1/2 cubes.
1/4 cup olive oil
4 cups chicken broth
1 3-inch cinnamon stick
Salt - you'll need lots for this
Handful of raisins
Handful of green Picholine olives, optional
1/2 cup cilantro (optional)
Plain couscous

1. Combine the chicken and spices through the saffron in a bowl. Marinate for an hour or so if you have the time.

2. Heat the oil in a large dutch oven. Add the chicken and let cook until browned on both sides.

3. Move chicken aside in the pot and add the onions, cook until softened.

4. Add the broth and scrape the bits off the bottom of the pan. Add the squash and cinnamon stick.

5. Bring to a boil and then reduce temp to low, cover and simmer for 2 hours. Add the raisins and olives about a half hour before serving so that they soften.

6. Serve in a bowl over couscous. Sprinkle cilantro on top. Print Friendly and PDF

Tigadegenan...Mafe...West African Peanut Stew

Whatever you wanna call it, this is my all time favorite West African meal. When I went to Mali for my last semester of college, this was one of the few dishes I ate. Not because I didn't try everything, but because in West Africa - especially Mali, there are only a few meals to make. Peanuts are everywhere in Mali - fresh, crunchy, and toasted over an open fire so that you can taste the char. So peanut butter (or peanut paste as it's called there) is abundant. It's not eaten with fluff on sandwiches though, it's made into this savory sauce that's served with mutton or chicken over rice with vegetables. This recipe comes from my colleague Jennifer Kawatu who has mastered the recipe with US ingredients and tools...it's right-on.

PS - this is the chicken version, not the mutton version ;)

1/2 jar natural peanut butter - no chunks, no sugar added (this is very important)
1 small can of tomato paste
1-2 onions, finely chopped
1 hot pepper or tsp of cayenne
1 tsp black pepper
2 tsp salt (add more to taste)
3/4 lb of chicken thighs, quartered
1 carrot, cut into 1/2 inch rounds
1/2 eggplant cut into 1/2 inch pieces
cabbage - about a quarter of a head, cut into wedges

1. Heat a few tsp of olive oil a large dutch oven over medium high heat.

2. Add the chicken and brown. Add the onions and cook until very tender.

3. Add vegetables and about 2 cups of water. Cook until veggies begin to soften.

4. While veggies cook, make a paste with the tomato paste and peanut butter. Add water until soupy consistency and easy enough to stir, keeping it thick.

5. Add the peanut/tomato paste mixture to the pot with chicken, stir well and turn temp down to medium low. Cook for about a half hour, adding a little water as needed (this should be a fairly thick but not pastey sauce). Cover and and let simmer until the oil from the peanut butter rises to the top in pools of red. THIS IS IMPORTANT! Do not stop cooking until this happens or it will taste only like peanut butter and not the sauce.)

6. Serve over white rice.

Print Friendly and PDF

Homemade Chorizo - No Meat Grinder Needed!!

I like to make chorizo tacos but the pre-cooked chorizo links that I get at my grocery store often get dried out when I cook it with other ingredients. So I prefer ground chorizo. On thing is, it's really tough to find. I found it once in Michigan and added it to my stuffing at Thanksgiving - that was GOOD. I like them in tacos, enchiladas, it's good with eggs! You can use this in so many ways and it's incredibly easy.

2 lbs ground pork
1/4 red wine vinegar
1 tbsp smoked paprika
1 tsp coriander
1 tsp cumin
4 cloves garlic, minced
1 tsp dried oregano
2 ancho chiles, rehydrated and seeded (you can find these at most grocery stores, whole)
2 guajillo chiles, rehydrated and seeded (harder to find, sub 2 small chipotles in adobo)
1 tsp salt
pepper
olive oil

1. Put the chiles in a food processor and pulse until pretty fine. Add the rest of the ingredients and run the processor until everything is mixed together well.

2. That's it!!!! Heat some olive oil in a large pan and cook until done!

Print Friendly and PDF

Thai Drunken Noodles

We have a Thai restaurant across the street from our house and I think their kitchen vent is aimed directly at our balcony. We sit out there on summer evenings and smell the most delicious, enticing yumness. It makes me want to have Thai every night for dinner (is this why 80% of my posts are Thai??). This is one of my favorite Thai dishes and I almost always order it when we get Thai out, which actually isn't that often - especially since I can make this at home.Anyway, I have a lot of Thai favorites but this one I like if we order out. This is modified from Cooks Illustrated, i's extremely flavorful and will taste just like take-out...although you know what's in it! Gotta warn you, not the healthiest but definitely worth it once and a while...

2 boneless chicken breasts, cut into 1/4 inch slices
1 tsp baking soda
8 oz rice noodles
1/4 cup vegetable oil
1/4 cup oyster sauce
1 tbsp plus 2 tsp soy sauce
2 tbsp dark brown sugar
1 tbsp white vinegar
1 tsp molasses
1 tsp fish sauce
3 garlic cloves, sliced thin
3 large eggs
10 oz broccolini, cut into 1 inch pieces
Handful chopped fresh basil

1. Combine chicken and baking soda with 2 tbsp water and let sit at room temp for about 15 minutes. Rinse in cold water and drain well.

2. Bring 6 cups of water to a boil and pour over noodles in a large bowl. Stir, then soak until noodles are almost tender (about 8 minutes). Drain and rinse with cold water. Toss with 2 tsp of oil.

3.Whisk oyster sauce, soy sauce, sugar, vinegar, molasses, and fish sauce in a bowl.

4. Heat 2 tsp oil and garlic in a large skilled over high heat, stirring occasionally until garlic is golden brown.

5. Add chicken, 2 tbsp sauce mixture and spread in an even layer. Flip once so that both sides are browned.

6. Push chicken to one side. Add 2 tsp of oil and add eggs. Stir gently to scramble and break up large pieces. Stir together with chicken and put in a bowl.

7. Heat 2 tsp oil to now empty skillet until very hot - almost smoking. Add broccolini and 2 tbsp of sauce and toss to coat. Cover and cook until browned and crisp. Transfer to bowl with chicken and eggs.

8. Heat 2 tsp oil in pan and add half of the noodles and 2 tbsp of sauce and toss to coat. Cook until noodles start to brown in spots, stirring halfway through cooking. Remove and add to the other ingredients and repeat with the rest of the noodles, adding the rest of the sauce.

9. When noodles are done, add the contents of the bowl (noodles, broccolini, chicken, eggs) and stir together. Add the basil and stir together.

Print Friendly and PDF

Pasta and Light Tomato Sauce

I had no idea what to call this. But it's a take on one of Lidia B's pasta dishes and became our favorite pasta dish this summer. Paddy's favorite dinner is pasta and red sauce but sometimes that red sauce gets a little heavy and hot in the summer. So, I lightened it up with some fresh tomatoes instead. This is incredibly easy and it's done in the time that it takes to boil the pasta - a great go-to!

Handful of spaghetti, linguini, angel hair
Olive oil
2 cloves of garlic, sliced
1-2 tsp of crushed red pepper
4 medium tomatoes, diced (5 or 6 romas) - roma tomatoes work best but any tomato will do!
1 heaping tablespoon of capers (optional but good!)
1/4 cup of black olives if you have them (cured, black olives the best)
Fresh basil
Shredded asiago, romano or parmesan

1. Boil the water with a good bit of salt. Throw in the pasta.

2. In a large saucepan, heat enough olive oil to cover the pan (2 tbsp -ish) on medium.

3. Throw in the garlic and crushed red pepper. Let it simmer for a minute but don't let the garlic burn.

4. Add the diced tomatoes and their juice and the capers and olives. Add a pinch of salt, if you're using olives and capers, you won't need too much.

5. Turn the heat up to medium high and bring to a simmer. Simmer until the tomatoes get nice and soft (about the time it will take to cook the pasta). Add 1/4 cup of pasta water as the sauce cooks down - you'll probably need to do this about twice.

6. Using tongs, take the spaghetti out of the water - you'll want a little bit of the water so no need to strain. Put the pasta in the pan and mix together with the sauce.

7. Top with chopped basil and cheese.


Print Friendly and PDF

Wednesday, October 3, 2012

French Apple Cake

The great thing about Cooks Illustrated is pretty much everything in it is a guarantee...as long as you make it right. I have a confession to make...we had Sara and Kiran over for dinner last weekend and I was in an Autumn mood. Although I had made homemade ice cream sandwiches (new summer favorite dessert!!), I thought I'd do something apple-y. Thing is, I forgot to make the top layer of this cake. Either way, it got two thumbs up from both the visitors and Paddy.

The bottom layer is like a cakey custard. The top layer (don't forget to separate the batter!) provides a tender, airy top to balance it off. Even better about this? No butter, cream, etc. which means my dad can eat it. Making it the right way the next time we go to CT for a visit...I'd provide a pretty photo but we ate it all :)

1.5 lbs granny smith apples, peeled, cored, cut into wedges and sliced 1/8 in. thick
1 tsp lemon juice
1 cup plus
2 tbsp flour
1 cup plus
1 tbsp granulated sugar
2 tsp baking powder
1/2 tsp salt
1 egg plus 2 egg yolks
1 cup vegetable oil
1 cup whole milk
1 teaspoon vanilla (make your own!)

1. Preheat oven to 325. Spray a 9 inch springform pan with  vegetable oil spray. Place pan on a foil-lined cookie sheet (don't skip this step).

2. Place the cut apple in a microwavable pie or cassarole dish. Microwave apples, covered, for about 3 minutes until a bit soft. Toss apples with lemon juice and set aside to cool.

3. Whisk 1 cup flour, 1 cup sugar, baking pwder and salt in a bowl.

4. In another bowl, whisk ONE EGG, oil, milk, and vanilla together until smooth.

5. Add the dry ingredients to the wet ingredients and whisk until just combined. TRANSFER 1 CUP OF BATTER TO A SEPARATE BOWL AND SET ASIDE.

6. Add egg yolks to remaining batter and whisk to combine. Gently fold in cooled apples. Transfer batter to pan and spread evenly.

7. Whisk remaining 2 tbsp flour into reserved batter. Pour over batter in pan and spread evenly. Sprinkle remaining 1 tbsp of granulated sugar on top.

8. Bake until cake is set, about 1 1/4 hours. Dust lightly with confectioners sugar to make it pretty when it's done and cooled.

Print Friendly and PDF

Tomatillo-Cilantro Salsa

I recently got a tortilla press. Yes, that's right. Why buy a package of corn tortillas in a matter of 30 seconds when you can take an hour and make your own? People often joke with me about how I make things a little harder sometimes than they need to be. But it's usually (USUALLY) because I like the process of doing it! (Eg. making cheese.) Anyway, when I was little, Kel and I made homemade tortillas with the help of her mom for Spanish class one time. I haven't forgotten how yummy they were, hot off the pan with a little butter. We at them like pancakes.

This recipe isn't for tacos, it's for salsa. But it's great with tamales (mix in with some shredded chicken and cheese), with steak, on top of arepas, and on just about anything. It's great with scrambled eggs and cheese for a weekend breakfast. This recipe is from Food and Wine You can swap out peppers depending on what you have (I still have a huge pot of jalapenos coming in on my balcony). 

1/2 lb tomatillos - you can get these in most grocery stores, just look hard.
2 serrano chiles or a couple of jalapenos (stemmed and seeded - leave a few seeds in if you like it hot!)
1 medium white onion, cut into wedges
1 clove of garlic, peeled
1 large beefsteak tomato, cut in half
1/2 cup cilantro (optional, I know some people can't stand it)
1 tbsp lime juice
salt and pepper

1. Preheat the oven to 500 (I use the grill for this - more char and less heat in the house, especially in the summer!). If using oven, spread first 5 ingredients on a cookie sheet  and roast for 15 minutes, turning once or twice. If using grill, cut the veggies a little bigger so they don't fall through and roast until softish and charred.

2. Let it cool a little when it comes out of the oven. Throw everything in a blender with the cilantro and lime juice, salt and pepper. Blend until you have desired chunkiness. Print Friendly and PDF

Chicken Lettuce Wraps

You all know I love dumplings! Well, these are dumplings without the wontons and chicken instead of pork - likely a healthier option. I got this recipe from Bon Appetit and really liked it.

4 tbsp fish sauce
2 tbsp lime juice
2 tbsp sugar
1 Thai chile or a tsp of chili paste
1 lb ground chicken
1/2 cup minced shallots
1/4 cup oyster sauce
1 tbsp flour
1 glarlic clove, minced
3 tbsp vegetable oil
1 head of Boston lettuce

1. Combine 2 tbsp of fish sauce, lime juice, sugar, half of the chile, and 2 tbsp of water in a small bowl. Set aside.

2. Combine remaining 2 tbsp of fish sauce, chile, chicken, shallots, oyster sauce, flour, and garlic in medium bowl and mix until ingredients are incorporated.

3. With damp hands, shape the chicken into small patties - like sliders. Cover and chill for about a half hour.

4. Heat oil in a medium pan at medium high heat. Cook the patties until they're lightly browned, about 3-4 minutes per side, depending on thickness.

5. Wrap each patty with a lettuce leaf and drizzle with or dip into the the dipping sauce.

**This meat mix could be used with wonton wrappers for yummy dumplings! Print Friendly and PDF

Wednesday, August 29, 2012

Almond Granola

I love granola as a snack on its own, with yogurt, on salad, sprinkled over pancakes...the list goes on. This is adapted from a Cooks Illustrated recipe - I like it because it's easy and not too sweet. You can always vary the amount of sweetness and ingredients but here's the way I like it:

1/3 cup maple syrup
1/3 cup packed brown sugar (light or dark will do)
4 tsp vanilla extract
1/2 tsp salt
1/2 cup vegetable oil
5 cups rolled oats (don't use the quick stuff!)
2 cups slivered almonds
1/2 dried coconut
2 cups raisins (craisins also good, or any dried fruit)

1. Preheat oven to 325 degrees and line a large baking sheet with foil or parchment.

2. Whisk maple syrup, brown sugar, vanilla and salt in a large bowl. Stir in the oil. Fold in the oats and the rest of the ingredients.

3. Transfer to baking sheet and spread into a thin, even layer. Using a metal spatula, press down on the granola until it's very compact.

3. Bake until lightly browned, 40 - 45 minutes, rotating pan halfway through.

Print Friendly and PDF

Chicken Gyros and Tzatziki Sauce

As many of you know, we went to the Greek islands on our honeymoon last year. The beaches were lovely, the people were warm and friendly, the Ouzo was, well...Ouzo, but the GYROS, oh man!! In Santorini we had a little corner spot that we liked to hit up on our way back from the beach. An appetizer, before our hors d'oeuvres of olives, cheese, and wine, before dinner. Yes, lots of eating. Anyway, the buttery grilled pitas with the greasy seasoned chicken oozing with cucumber yogurt sauce and fresh tomatoes were just about heaven. I found this recipe online as I was looking for stuff to do with cukes. This tzatziki sauce is just about spot-on.

Gyros:
4 boneless, skinless chicken breasts cut into 1/4" strips
2 tbsp finely chopped dill
2 tsp dried oregano
1 onion, thinly sliced
A little olive oil for the saute
Juice of 1 lemon
Salt and pepper

Tzatziki: 
8 oz Greek yogurt
1/2 cucumber grated and squeezed to remove all water
2-3 tbsp fresh dill, finely chopped
4 scallions, finely chopped
2 tbsp fresh lemon juice
Drizzle of olive oil
Salt and pepper to taste
*Optional: 1 clove garlic (use garlic press)  

Serving:
8 pitas
Fresh lemon juice
Diced tomatoes
Feta
Lettuce  

1. Place chicken and other gyro ingredients in a large freezer bag and marinate a few hours or overnight.
2. Mix the tzatziki ingredients together in a medium sized bowl and set aside in the fridge.
3. Heat large skillet to medium high and saute the chicken in a little olive oil with onion until chicken cooked through (remove chicken if onions need to cook longer - they should be soft).
4. Heat a separate pan to medium high heat and drizzle a little olive oil in the pan or lightly spray the pitas with Pam or other spray oil.
5. Heat each pita until it's warm and soft, keep closed tightly in tinfoil until ready.
6. Assemble the gyros by loading the chicken, onions and other serving ingredients onto the pita (not as a pocket but they should be soft enough to fold around the insides like a taco). Spoon the tzatziki on top and you're ready! 

Print Friendly and PDF

Cheesy Artichoke Dip

I'm a sucker for artichoke dip and this is the best I've come across. It's a miracle recipe actually - a miracle that something so easy can be sooooo loved by those who eat it and a miracle that these three ingredients can actually taste so good. Kinda like mom's crab dip, it's kinda better not knowing what's in this. Whatever you do, don't tell people as they're eating it. I like to say that it's a secret recipe.

Thanks to Jenny Brokaw for recipe, as she says "it's hardly a recipe..."

1 cup grated Parmesan cheese - I've used grated Asiago and it's almost better!
1 cup light mayo - yes, use the light! Otherwise, it's greasy
1 can drained and chopped artichokes

Mix together and bake at 375 for 35 minutes or until bubbly and slightly browned on top (if you can wait that long!). This is great served with crackers, tortilla chips or thinly sliced and toasted baguette.

Print Friendly and PDF

Sunday, August 26, 2012

Carrot and Jalapeno Salad

Growing up we had a huge garden. I think I took it for granted when I was younger - I wasn't that interested in vegetables and it really only seemed cool when we ended up with the odd zucchini that grew to the size of a small baseball bat. Now that I'm older and love to cook, I'd love nothing more than the garden we used to have. Unfortunately, our tiny backyard doesn't get any sun so I'm stuck farming on my front balcony. We've had some success with potted tomato plants but this year I added a pepper pot. We have more jalapenos than we know what to do with. So I've branched out beyond the salsa and guac and found this recipe. I was really skeptical about it (I'm not a huge carrot lover) but the ingredients seemed interesting so I gave it a shot. LOVE it!! It's modified from a recipe out of the Herbfarm Cookbook - a wedding present from my old roommie and dear friend Per. This is delicious and healthy - a great lunch salad. Don't be worried though - the salad isn't spicy, as long as you de-seed and devein your peppers.

**Be warned - when chopping your jalapenos - wear gloves. No matter how hard you try, you WILL put your finger in your eye and deeply regret it. I skipped the gloves when making this the last time and my finger tips burned for days!

4-5 large carrots - sliced using a rolling cut (very small wedges). Note - if using larger carrots, you might want to blanch the cut carrots to soften them up a little. Fresh from the farm smaller carrots are a little more tender and sweet and don't really need the quick boil.

2-5 jalapenos, seeded and finely chopped
1 lime - zest and juice
2 TB olive oil
2 tsp honey
2 TB chopped cilantro
2 TB chopped mint
1/4 cup chopped basil
1 cup cold cooked brown rice (optional - I think it gives this salad a little more umph)
1/2 tsp salt

1.Combine all of the ingredients and let marinate for at least an hour. This salad gets better with time!! Print Friendly and PDF

Wednesday, July 4, 2012

Sichuan Pork Stir Fry

The hotter the better right? Well, this one's five-alarm. Modify this recipe according to your heat threshold and be careful when making this for guests...I have come to realize that not everyone finds sweat the sign of a good meal. Personally, once the beads form under my eyes and on my forehead, I know I've reached optimal spice. Just make sure you have a bottle of Zantac close-by for later. This one's from Cooks Illustrated and what surprised me was how tender the pork was! Is it the baking soda soak? Who knew?? I highly recommend this one - Paddy gave this a higher rating than Wang's. All you Somerville folks know that that's a blue ribbon!

Sauce
1/2 cup chicken broth
2 TB sugar
2 TB soy sauce
4 tsp Chinese black vinegar (you can sub with a little less balsamic or worcestershire sauce)
1 TB toasted sesame oil
1 TB rice wine or dry sherry
2 tsp ketchup
2 tsp fish sauce
2 tsp cornstarch

Pork
12 oz boneless country style pork ribs, trimmed
1 tsp baking soda
1/2 cup cold water
2 tsp rice wine or sherry
2 tsp cornstarch

Stir Fry
4 cloves garlic, minced
2 green onion, whites minced, greens sliced thin
2 TB chili paste
I added 1 tsp fermented black beans and chili for extra kick!!
6 oz shitakes, sliced thin
2 celery ribs or bok choy
Broccoli, matchstick carrots also good!

1. Whisk all sauce ingredients together and set aside.

2. Cut pork into 2 in. lengths and then each length into 1/4 in. matchsticks. Combine with baking soda and water and let sit at room temp for 15 mins or while you chop your veggies.

3. Rinse pork in cold water. Pat dry with paper towels. Whisk rice wine and cornstarch and add pork. Toss to coat.

4. Heat 1 TB oil in pan to medium high. Add mushrooms and stir frequently until tender. Add celery and any other veggies and cook until still crisp but tender - 2-4 mins. Transfer veggies to bowl and set aside.

5. Add remaining oil to the pan and reduce to medium low heat. Add garlic, green onion, and chilli and stir for about 30 seconds. Add pork, stir frequently until cooked. Add sauce mixture and increase heat to high. Stir constantly until sauce thickens. Add in the veggies and you're done!

Serve with jasmine rice. Print Friendly and PDF

Spicy Thai Coconut Chicken Soup

I know, it's summer and no one wants to eat soup. But I just found this recipe from Cooking Light in a pile and had to share. It's a great way to use leftover chicken - either grilled or roasted - just make sure to shred not dice. I made this a few times over the winter and it was delicious. Kel and Chad loved it and I promised long ago that I'd share. So here it is:

2 tsp canola oil
1 cup sliced mushrooms
4 tsp minced ginger
4 garlic cloves, minced
1 stalk lemongrass, halved lengthwise.
2 tsp garlic chili sauce (Sriracha)
3 cups chicken stock
1 1/4 coconut milk
4 tsp fish sasuce
1 TB sugar
2 cups shredded cooked chicken 
1/2 cup green onion
1/4 cup lightly chopped cilantro
2 TB lime juice

1. Heat a pot to medium and add oil. Add mushrooms and following ingredients through the lemongrass. Cook for about 3 minutes.

2. Add chili and cook for a minute. Add chicken stock, coconut milk, fish sauce and sugar and bring to a simmer. Reduce heat to low and simmer for about 10 minutes.

3. Add the chicken. Discard the lemongrass.

4. Serve and top with cilantro, green onion and lime juice. Print Friendly and PDF

Thai Grilled Beef Salad

Have you ever noticed that flank steaks are always enormous? It's a good thing - it's my favorite cut of meat and there are always leftovers. I love to make sandwiches with the leftovers - heat it up and put it in a baguette with some lettuce and it's delicious. It's also great on salads and, since I love everything Thai...(did I ever imagine fish sauce would become as regular an item on my grocery list as mayo??).  This recipe modified from Cooks Illustrated is a good one for a cool summer dinner.

Juice of 2 limes
2 TB fish sauce
1/8 tsp paprika
1/8 tsp cayenne
2 TB water
1/2 tsp sugar
3 shallots
1 cup mint leaves, chopped
1 cup cilantro, chopped
Flank steak leftovers - or whole one if you're looking for something to do with it!
Lettuce
1 cucumber, sliced

1. Mix the first nine ingredients together in a bowl until the sugar dissolves.

2. Heat up your flank steak quickly in a hot pan or leave it cold.

3. Add to the lime mixture and marinate about 5 minutes.

4. Layer the lettuce and cucumbers. Remove the steak from the marinade and lay on top. Spoon extra dressing over the salad as desired.

Print Friendly and PDF

Philly Cheesesteak

I wasn't sure if I should post this since it's so ridiculously simple. But I made these recently and I don't know what took me so long to make them at home. I LOVE cheesesteak! Laur would probably be disappointed in this recipe - it's not quite authentic but this is a really easy 5 minute dinner to satisfy a craving.

(Makes about 2)
1/2 lb roast beef from the deli counter
1/4 lb sliced American cheese
1 baguette

1. Heat a pan to medium high and add a touch of canola oil. Fry the roast beef until it browns a bit and gets a little crispy around the edges.

2. When the meat is just about done, layer the American cheese over it in the pan so it melts.

3. Stuff the meat and cheese into your baguette and enjoy! Print Friendly and PDF

Sunday, March 25, 2012

Pork Dumplings

So there's not much to these. I'm throwing this in because it's a great way to use extra Banh Mi meat. All you need are some wonton wrappers - square or round. And an egg.

1. Beat your egg and set aside.

2. Spoon a teaspoon of the meat mixture into the wonton wrapper. Use your beaten egg to wet two of the edges or one half of a round wonton wrapper. Fold over and place on a parchment lined baking sheet.

You can cook these several ways:
- If you have a steamer, these are great and light steamed.
- Fry 'em.
- Make them into potstickers by heating a couple TBs of canola oil in a pan that has a lid that fits tightly. Fry the dumplings in the oil until they're brown and crispy on each side and then add 2-3 TBs of water to the pan, put the lid on and let them steam until the water has evaporated. They'll be nice and chewy when they're done.
- Use them in wonton soup. Heat a TB of oil in a pot, add some garlic and ginger, chopped green onions and a dash of soy sauce. Add enough chicken broth for your soup and bring to a boil. Add the uncooked dumplings and cook until the pork is done, a couple of minutes. Throw in some bok choy, basil, and or cilantro and/or a squeeze of lime when you serve.

FREEZE them! Layer them in a large tupperware container with parchment in between each layer. Pull out as many as you want whenever you're in the mood for any of the above meals. Soooo good to have these on hand!!
Print Friendly and PDF

Banh Mi (Vietnamese Meatball Sandwiches)

YUUUUUM. One of the best things about traveling is street food. While a lot of the places I go for work aren't exactly culinary paradises, from time to time I hit the jackpot. And southeast Asia has the best street food and some of the best food in the world...haven't you noticed a bit of a pattern in the recipes post on this blog? Banh mi is a delicious marriage of Vietnam and France. They're a wonderful use of ground pork (cheap eats), they're flavorful, addictive and if you can find yourself a really good loaf of crusty French bread (not the supermarket stuff) then this becomes one of the best meals on earth...

Not only are these meatballs great in a sandwich, but they're really good with some chicken broth, ginger and some noodles in a soup. I like to make a double batch, freeze extras and use the rest for dumplings.

Meatballs:
1 lb ground pork
1/4 cup finely chopped basil
4 cloves garlic, minced
3 green onions finely chopped
1 TB fish sauce
1 TB sugar
2 tsp cornstarch
salt and pepper
Dark sesame oil

Fixins:
2/3 cup mayo
1 TB chili garlic sauce or another hot sauce
1/3 cucumber, thinly sliced in long strips
Bunch of cilantro
1 large carrot, peeled in ribbons
2 TB sugar
2 TB rice vinegar
Lettuce

1. Start with the fixins, the pickled veggies to go on top. I cheat here and make my own version to soak as I make the meatballs. Combine the sugar and rice vinegar until dissolved. Add a TB of water. Throw in the carrots and mix well. Mix every few minutes as you work on the meatballs.

2. Combine all of the meatball ingredients in a medium bowl and mix well with your hands.

3. Form them into balls - not too big, slightly smaller than a golf ball. They'll be a bit gooey. Put them on a foil lined baking sheet as you go.

4. Heat about 2 TB of sesame oil in a large frying pan. Once it's nice and hot, put your meatballs in and fry away. Turn them every 30 seconds or so to get them nice and brown and caramelized.

5. Do them in batches if you need to. Put them on a plate with paper towels as you go to get rid of the excess oil.

6. Slice your baguette in half. Combine the mayo and chili sauce and put a good coat on both sides of the sandwich.

7. Lay a piece of lettuce. Then a bunch of the pickled carrots. Then some cucumber. Add a few sprigs of cilantro. Then put one layer of meatballs - usually about 3 fit on a good sized sandwich (depending on how hungry you are!!)

You'll never know how you lived without these!!!


Print Friendly and PDF

Arepas with Cabbage Slaw

Not sure why, but I've only recently discovered arepas. And boy are they good. Crispy corn pancakes with lots of cheese and shredded meat inside. I alternate between pork and chicken for these, depending on what I have in the fridge. But lots of cheese is key.

2 cups masa harina
1 3/4 plus 2 TB warm water
1 cup shredded pork or chicken
1 cup shredded cheese - preferably a cheddar/jack combo

2 cups finely shredded red cabbage (you can use bagged slaw mix but the red is nice)
1/4 small red onion, very thinly sliced
2 TB red wine vinegar
Cilantro, sliced jalapenos, sour cream and any other toppings you like

1. Mix the masa and water together in a medium bowl to form a soft dough. Cover with plastic wrap and set aside for 15 minutes.

2. In another bowl, toss the cabbage, vinegar and onion together...this gets better the longer it soaks.

3. Mix your shredded meat and shredded cheese in a bowl and set aside.

4. Form the dough into 4 balls and cover with plastic. Working with one ball at a time, flatten the ball on a sheet of plastic wrap to a 7-in round. It should be fairly thin, about 1/4 inch. Spoon some meet and cheese into the center and then bring the dough up around the sides to form a ball with the filling in the middle. Move the dough around or patch up any holes or areas where the meat or cheese are exposed - they'll burn.

5. Then flatten your ball into a 4 inch patty. Repeat with the other three.

6. In a cast iron pan, heat 1/4 inch of vegetable or canola oil on med-high heat until shimmering. Fry up each arepa, one at a time, until they are golden brown and flipping only once. About 5 minutes.

7. Drain on paper towels and then on a wire rack. Top with the slaw, sour cream, salsa, whatever you like!

*These are good hot off the pan but you can also cool them and bake them at 375 in the oven later. Or, freeze them individually in foil and bake at 375 for about 30-45 minutes until crispy again.
Print Friendly and PDF

Friday, March 23, 2012

Chocolate Espresso Macarons

We just threw my sister a baby shower...yay! I'm going to be an auntie in a month and I can't wait to meet little bebe. I wanted to make something edible for the party favors but wanted it to be special. Since French macarons are making a US invasion these days, overtaking the cupcake phenomenon with fury, I thought I'd try my hand. This was the most appealing recipe I found - because I love chocolate and coffee. And because this comes from a food blog called "effing dericious." With an "r." Enough said.

Anyway, be forewarned - these are NOT easy. A lot can go wrong here but don't be discouraged if you end up with dense cookies on your first go. Mine are still a work in progress. But the flavor of these is so wonderful that it almost doesn't matter if they don't have their perfect 'feet.'  But you do hope for a light, fluffy, chewy, pillow of sweetness....here it goes...

*You do need a digital scale for these. Don't cut corners. You won't win.
You also need silpat baking sheet liners, or parchment.

Macaron Shells:
110g blanched almonds (or almond powder - can be found in specialty aisle of some grocery stores)
200g powdered sugar
28g granulated sugar
90g aged egg whites - separate them and let them sit overnight on the counter. Yes, you heard me.
2 tsp espresso powder (you could use instant coffee to cheat a little here)

Chocolate Espresso Ganache Filling:
250g heavy cream
4 tsp light corn syrup
240g bittersweet chocolate, finely chopped or in chips
30g butter, cut into small pieces
3 tsp espresso powder

Make the ganache first:
1. Heat the cream in a small saucepan with the corn syrup. When the cream just begins to bubble at the edges, remove from heat and add the chocolate. Let sit for a minute or two and then stir in espresso powder. Mix well.

2. Add the butter until the pieces have melted away and the chocolate is silky.

3. Cool the ganache in the fridge while making the macarons. (If making ahead of time, take out several hours in advance. You want it to be smooth and able to squeeze out of a pastry bag. You don't want it so thick and hard that it breaks your macaron shells!!)

Now for the macarons, are you ready?
1. Preheat the oven to 270F. Measure out your ingredients. If using blanched almonds, grind in a food processor until so fine that you can sift it like flour (hard to achieve but it is possible).

2. Sift the almond powder, espresso powder and powdered sugar into a medium bowl.

3. Using a stand or hand mixer, beat the egg whites until they foam up a bit. Keep beating while you gradually add the granulated sugar. Beat until stiff peaks form. Aim for shaving cream consistency but don't over beat. You want it to be glossy.

4. Carefully fold in half of the dry ingredients with a spatula and mix with as few strokes as possible. Add the remaining dry ingredients and mix and incorporate. It's tough to know when to stop mixing, but you want the batter to be like lava. The batter should fall back in a thick ribbon off the spatula.

5. Using a pastry bag or a ziplock with the corner cut off, pipe 1-inch blobs on silpat lined baking sheets. Make sure to evenly space them 1 inch apart, they will spread a bit. Don't draw circles, pipe directly onto the baking sheet to form the blob.

6. Once the batter is finished, let them sit on the counter for about 30-40 minutes until the batter has spread a bit and a little skin forms on the top of each. Don't touch them!!!

7. Put them int he oven for 18 minutes. Set the timer. Seriously. And hope for the best.

8. Once they're out of the oven, let them cool before removing them.

9. Fill your pastry bag/ziplock with the ganache filling and pipe enough to fill about 3/4 of the shell. Top with another shell to form a sandwich.

10. These save for several days in the fridge and get better with age.
Print Friendly and PDF

Homemade Vanilla Extract

I hope you'll be as surprised as I was to find out that you can make your own vanilla extract...with two ingredients!! All you need is a few vanilla beans and some vodka.

I use small 4oz glass bottles with corks that you can find at the container store. You can find vanilla beans at whole foods, Penzy's etc. For a 4 oz bottle, I usually use 3 beans.

Slice the beans open on one side, scrape out the insides with your knife and put in the bottle. You don't have to get it all but it's good to open up the beans and get some of the goodness out. Put the beans in the bottle too. Fill the rest with vodka and let sit for a week or two. Give the bottle a good shake every couple of days to help the process. It'll eventually turn dark brown and will be yummy and a lot cheaper than the store bought stuff.

**Or, you can put the whole (uncut) beans in a larger bottle, fill with vodka and let sit for a week or so. Vanilla vodka is great for cocktails!
Print Friendly and PDF

Mocha Double Layer Cake

I don't think that I have to explain how much I love chocolate. And cake. And coffee. So when you combine them all into a really moist chocolate cake? Perfection. I grew up in a house that made double layer cakes almost exclusively. There's something so pretty about a big, round, well-frosted cake. And as I always say - more layers = more frosting. So please don't try to make a sheet cake out of this...thank you.

Cake:
1 cup cocoa powder (plus more for dusting)
3/4 cup strong coffee, boiling
1 cup milk, room temp
2 3/4 cups cake flour
1 tsp baking soda
1/2 tsp salt
3 sticks of unsalted butter, room temp (plus more for pans)
2 1/2 cups sugar
1 TB vanilla extract
4 large eggs, room temp (put them in a bowl of hot water for 10-15 mins)

1. Preheat oven to 350. Generously butter two 8' round cake pans and dust with cocoa, tapping out excess.

2. In a medium bowl, sift the cocoa and whisk in the coffee and milk. Set aside to let cool.

3. In a medium bowl, sift the cake flour, baking soda and salt.

4. In a large bowl and using a rubber spatula, mix the butter until fluffy and gradually add the sugar and vanilla. Add the eggs one at a time, mixing after each.

5. Pour in the cooled cocoa mixture and mix until fully incorporated. Add the sifted dry ingredients to the chocolate mixture, stirring until just combined.

6. Pour the batter into the pans and bake for 35 minutes or until a toothpick comes out clean. Cool in the pans on a wire rack for 15 minutes, then take the cakes out and cool completely on the wire rack.

Frosting:

3 1/2 cups confectioners sugar
1 cup cocoa powder
1 1/2 sticks butter at room temp
1/4 cup milk, room temp
1/4 cup coffee
2 tsp vanilla extract

1. Sift the sugar and cocoa together in a large bowl.

2. Add the butter, milk, coffee and vanilla and mix with a spoon or spatula until mostly wet/incorporated.

3. Using an electric mixer, mix on medium speed until well incorporated and smooth.


Print Friendly and PDF

Deep Dish Pizza - the BEST yet?

My oh my oh my. You all know that I get excited about good eats. Mom's crab dip. Andy's fried wontons. Dali's goat cheese dip...there are a few special items that I hold close to my heart. Pizza in general is a favorite. I think if my sister Holly and I could inject it, we would. So I make a lot of pizza at home, and it's delicious. I have a stone, have finally found the right cheese combo to make it close to perfect. But, there's something about the crust. I just can't get it crispy enough.

Enter cast iron pizza making. I saw this in a Bon Appetit and then looked it up again tonight. I've never been one for a deep dish pizza, I prefer thin and crispy - cracker-like. But this...this is something else. You start with the cast iron pan, then embark on some interesting oven techniques. And what will really throw you off - the always backward Chicago style toppings. Cheese first, sauce last. Turns my world upside down. The result is the crispiest pizza ever with zero clean-up. I mean, none. Pan goes straight back in the cupboard. You must try this...

Here's what you need:

1 store bought pizza dough (that's right - buy it). Leave it out all day at room temp so that it rises and gets to room temp.
Cheeses - I used packaged deli-sliced fontina and provolone and a layer of grated romano. perfect.
Crushed canned tomato - drain for 10 mins or so in a strainer
Meat - I used precooked, ground Italian sausage (I don't recommend veggies for this style of pizza)

*Ingredients depend on how much pizza you're making and how big your pan is. 1 store-bought pizza dough fits a standard, large cast iron pan well.

1. Oil your cast-iron pan with olive oil so that there a good layer on the bottom and the sides of the pan.

2. Gently roll out your dough just bigger than the circumference of the pan. Lay in the pan and push the extra up around the edges of the pan. This is important to hold all of the next layers in like a pie.

3. Place a layer of each cheese on the dough.

4. Lay your meats. Sausage pepperoni, etc. should come now.

5. The crushed tomatoes comes last. A good layer will do, depending on preference.

6. Put the pizza/pan in a cold oven, middle rack, and turn oven on to 500F.

7. Once the oven finishes preheating and reaches 500, turn the oven down to 400 and bake for another 30 minutes.

8. Take the pizza out and let sit for a minute or two. Use a spatula and pull the pizza out of the pan - there should be no sticking at all. Slice it up and ENJOY!!
Print Friendly and PDF

Sunday, February 26, 2012

Homemade Mozzarella


So I'm on a bit of a cheese roll. Once I got the hang of ricotta (and totally addicted), I figured I'd branch out and see what else I can make...stay tuned for Greek Yogurt. Now, the mozzarella was a bit trickier and required some new ingredients and tools. My biggest pot is not stainless steel and you have to have one for the cheese - so make sure you've got one, a big one (8 Qts). You'll also need a digital candy thermometer that reads as low as 80F and a large slotted plastic spoon. The two hard to find ingredients for this are citric acid and rennet. I bought them on Amazon after a bit of searching in local stores. Here's how it goes according to the "Cheese Queen" on www.cheesemaking.com...


1 1/2 tsp citric acid
1 cup bottled water - divided (must be non-chlorinated so don't trust the tap?)
1 gallon whole milk
1/4 of a rennet tablet

1. Dissolve the citric acid into one cup of cool bottled water and pour into your pot. Add the milk.

2. Heat slowly to 90F.

3. Remove the pot from the burner. Dissolve the rennet in 1/4 cup of bottled water. Pour the rennet mixture into the milk and stir slowly for 30 seconds. Cover and let sit for 5 minutes.

4. After 5 minutes, check the curd that has formed. It will look like custard and the whey will be clear. If it's too soft, let it sit for a few more minutes.

5. Use your knife to cut the curd into 1 inch squares while still in place in the pot. You will have a layer of curd that look like dice or square pieces of tofu in the pot.

6. Place the pot back on the burner and heat to 105F. Stir slowly.

7. Take off the burner and continue stirring for 2-5 minutes. Using a large slotted plastic spoon, scoop out the curd to a colander and drain the whey. Gently press the curd to drain as needed.

8. Transfer the curd to a microwave proof bowl. Microwave on high for 1 minute. Pour off the whey.

9. Knead in the bowl and then reheat for another 30 seconds. Repeat if needed until the curd is 135F.

10. Transfer the curd to a cutting board and knead as you would bread dough. Return it to the microwave if needed. If it's hot enough, it'll stretch. Stretch it a bit and then knead it back into a ball until smooth and shiny.
Print Friendly and PDF

Pasta with Cauliflower, Bacon and Sage

So cauliflower is definitely not what I think of when I want to make pasta. But I came across this recipe and it's really good! The sage and bacon give it a ton of flavor. It's also a really quick one, so good for a weekday night. You can never really go wrong with bacon...

1/2 box of pasta - ziti, penne, rigatoni are all good for this
5 slices of bacon, chopped
3 TB butter
1 onion, diced small
1 clove of garlic, minced
Pinch of crushed red pepper
1 medium head of cauliflower cut into florets
2 TB fresh sage, chopped
2 tsp red-wine vinegar

1. Cook the pasta until just al dente. Drain when finished, reserving 1/2 cup of pasta water.

2. In a large saute pan, cook the bacon until crispy. Drain most of the bacon fat, leaving a good layer in the pan. Add the butter and onions, garlic and red pepper flakes and cook until onions are translucent.

3. Add the cauliflower, some salt and pepper, cover and cook until tender, stirring occasionally.

4. Stir in the bacon and sage and mix well. Cook for a minute or two. Add the pasta and the pasta water to create a sauce to coat the pasta.

That's it!! Print Friendly and PDF

Veggie Lasagne


 I think lasagne is my all time favorite comfort food. It's the kind of food that just makes me go aaaaaahhhh. The layers of flavors and the cheeeese. Of course, the cheese. We used to have it a lot growing up and then my mom started adding grated vegetables. This is a take on hers. She always included shredded carrots which give it a nice sweetness. It's one of those meals that's different every time, depending on what you've got in your fridge. I'll include some suggestions for variations below. But overall, the zucchini and mushrooms in this give it one more dimension - and make it taste a little lighter.

4-5 cups of tomato sauce - (just cause it's a veggie lasagne doesn't mean you can't have meat. Add some ground sausage to your sauce for even more flavor)
1 package of no-boil lasagne noodles
1 big or 2 small zucchinis - grated and squeezed thoroughly through cheesecloth or papertowel
1 box of baby bella mushrooms - finely chopped
1 small container ricotta - you can make your own! (sometimes I like to add goat cheese)
1 egg, beaten
1 package of shredded Italian cheese (or sliced fontina, provolone, fresh mozzarella)
1 cup fresh basil, roughly chopped

1. Preheat oven to 350.

2. Mix the ricotta with the beaten egg in a small bowl. Add a bit of salt and pepper and half a cup of the fresh basil.

3. In a large rectangular baking dish, ladle enough sauce so that it coats the bottom. Arrange one layer of the dried noodles across the dish.

4. Add a layer of ricotta over the noodles and spread so that it reaches all corners and edges. Add all of the shredded zucchini and then press down lightly with your hands. Add some more tomato sauce - just sprinkle it over the zucc. It doesn't have to cover it all or be perfect.

5. Add another layer of noodles and some more ricotta. Sprinkle all of the mushrooms. Add some shredded cheese or sliced provolone or fontina if you're using that instead.

6. Add another layer of noodles. Depending on how deep your dish is, you can repeat another layer of cheese and sauce. You should layer until your lasagne is even with the top of the dish. For the final layer, ladle enough sauce over the top so that the noodles are covered. Top with fresh mozzarella or other shredded cheese.

7. Tent tin foil over the lasagne to completely cover and seal it - but try not to let it tough the top or all of your cheese will come off with the foil when it's done baking. Put the dish on a cookie sheet and into the oven for 1 hour.

8. After an hour, take the foil off and cook for another 15 minutes until the cheese bubbles and is golden.

Sprinkle with the rest of the basil and enjoy!!

Print Friendly and PDF

Sunday, January 22, 2012

Ricotta Pancakes

I grew up in a pancake house. I realize that sounds like I was born in an IHOP. Not quite. But when I was little...and still today actually, we would get up on a Saturday morning and dad would grab the box of Bisquick and start up the griddle. Reading the Sunday comics with sticky syrupy fingers...heaven. They were always quite heavy pancakes, I think it was the Bisquick. So when my colleague Beth passed me this recipe after I shared the homemade ricotta recipe with her - I knew I'd hit the jackpot. I made these pancakes this morning and they were the lightest, fluffiest pancakes I've ever had.


1 cup ricotta or cottage cheese - best with homemade ricotta
1 cup sour cream or plain yogurt
3 eggs, separated
1/2 tsp baking soda
1 cup flour
1 TB sugar
2 TB lemon juice
2 tsp lemon zest
butter for the pan

1. Beat together the ricotta, sour cream, and egg yolks.

2. Combine baking soda, flour, and sugar.

3. Beat egg whites until fairly stiff.

4. Stir the flour mixture into the cheese mixture, blending well but not beating. Stir in the lemon juice and zest. Gently fold in the egg whites - they should remain somewhat distinct in the batter.

5. Add batter to a heated buttered pan by heaping tablespoon. Cook until lightly browned on each side and cooked through the center. They will be very light and fluffy - don't overcook!

Print Friendly and PDF

Sunday, January 8, 2012

Orange and Soy Baby Back Ribs

I had never made ribs before. We used to eat them a lot when I was younger and for a few years I remember picking them as my birthday dinner when I was little. I had a hankering for ribs recently and decided to give them a shot. This Bon Appetit recipe is quite different because it doesn't involve a long day of baking or grilling. You just have to give them a long simmer - and then a quick broil. I was afraid they'd end up dry but they were fall off the bone delicious. One of the best dinners in a while - and VERY easy!!!

3 lbs of baby back ribs, cut between bones into individual ribs
1 cup soy sauce, divided
8 cloves garlic, minced, divided
4 tsp cumin, divided
3 tsp red pepper flakes
3 TB vegetable oil
6 scallions, chopped - only the white and light green
1.5 cups orange juice
Zest from 1 orange, lime and lemon
3 TB honey

1. Place the ribs, 1/2 cup soy sauce, 3 minced garlic cloves, 2 tsp cumin, and 1 tsp red pepper flakes in a large dutch oven. Add enough water to completely cover the ribs.

2. Bring to a boil and immediately reduce to a simmer. Cover leaving the lid ajar and and simmer for about 2 hrs.

3. Drain the ribs and set on a cookie sheet with tin foil (you MUST use tin foil or you'll have a very bad clean-up!)

4. Heat oil in a small saucepan and add the remaining cumin, red pepper flakes, garlic, and green onion. Saute until soft and then add the remaining soy sauce, orange juice, and honey. Bring to a boil and cook until sauce is thick, about 15 minutes.

5. Preheat the broiler and brush the ribs generously with the sauce. Place the ribs under the broiler and cook until the sauce bubbles, about 3 minutes. Turn over and re-glaze, cook for another couple of minutes.

6. Take the rubs out of the oven and drizzle with more sauce and top with the zest.

YUM!!!!

Print Friendly and PDF

Beef Curry

I don't usually like beef in my curry but we tried this last week from Food & Wine and it was delicious. It was very quick to make although it could be a while before the smell of the house is curry free. Occupational hazard I suppose...

1.5 lbs lean ground sirloin
1 large onion, finely chopped
1 carrot, finely diced
handful of cauliflower florets if you have some
2 TB minced ginger
2 garlic cloves minced
1.5 TB curry powder
2 TB flour
1 large yukon gold potato, cut in 1/2 inch dice
1.5 cups chicken broth
14 oz can of coconut milk
14 oz can of diced tomatoes with juice
1 cup frozen peas

1. In a large dutch oven, heat a bit of canola oil and then add the sirloin. Break it up as it cooks so that you don't have any lumps.

2. Add the onion and ginger, potatoes, carrots and cauliflower if you have them. Cook until soft. Add plenty of salt and pepper.

3. Add the curry powder and cook for a minute or two. Then add the flour and stir until all veggies are coated.

4. Increase the heat to high and add the chicken broth and tomatoes and stir well. Stir up any bits from the bottom of the pot.

5. Bring to a boil and then and then lower the heat to low, cover and simmer for 20-30 minutes. If the sauce is too thick, add some broth. If it's too runny, leave the lid off for a bit and let it boil away.

Serve with basmati rice and/or toasted naan with butter.

Print Friendly and PDF