It's been HOT this summer. Really, really hot. Paddy still asks for scorching pasta and sauce about weekly, but I just can't do it. I'm iced coffee and pasta salad May-Oct with few exceptions. This is super easy and a good change up from the usual.
Half a package of frozen cheese tortellini cooked extra soft and tossed with olive oil
1 cup sliced salami - either chopped up extra deli meat or packaged, sliced salami
2 cups cherry tomatoes
1-2 cups fresh mozzarella, chopped
1/2 cup fresh basil
1/3 cup chopped jarred peroncino
1/2 cup olive oil
2 tbsp red wine vinegar, or balsamic
1 tsp honey
1/4 tsp onion powder
1/4 tsp garlic powder
Salt and pepper
Showing posts with label Italian. Show all posts
Showing posts with label Italian. Show all posts
Tuesday, August 28, 2018
Saturday, February 3, 2018
Pizza Dough
Friday night is pizza night here. Most of the time we make it ourselves and Jack helps. I often buy a frozen ball of dough from the grocery store but lately I've been making it. This Giada dough recipe is dough perfection. It rolls out super thin which makes for a super crispy crunchy crust, which is how we like it in the Saul house. Note: this makes 2 large pizzas.
1 1/2 cups warm water
1 packet active dry yeast
4 cups all-purpose flour
1/2 tsp salt
1. Measure the water and add the yeast. Let sit until it dissolves and bubbles - about five minutes.
2. STAND MIXER: In bowl of stand mixer, add flour and salt. Add yeast mixture and work with dough hook for a couple of minutes, until dough comes together and becomes smooth and elastic. BY HAND: in a large bowl, stir until dough comes together, knead on floured work surface until smooth and elastic, about 10 minutes.
3. Drizzle the inside of the bowl and the dough with olive oil. Cover bowl with plastic wrap and let sit in a warm place for 2 hours or until doubled in size.
4. Pull dough out and punch it down. Roll it out, place it on a piece of parchment sprinkled with cornmeal. Dress up up the pizza and place it on a large cookie sheet that's been preheating in 475 - 500 oven. Cook for 10-15 minutes until cheese starts to brown and crust is crispy.
Friday, May 6, 2016
Pork Shoulder Ragu
This is my grand finale for winter time, one pot masterpieces. We still have a few chilly days left so squeeze this one in while you can. We're big on pasta and sauce in our family. It's Paddy's favorite. But sometimes I get a little tired of the same ole sauce. I came across this one on Food52 and boy is it good. I've made it twice in the last two months - the first time in a dutch oven, the second time in a slow-cooker because we just had to get. out. of. the. house. If you use a slow cooker - I highly recommend still browning the meat on the stove top and transferring 24it after. Serve this with a wide noodle like papardelle or tagliatelle.
2 - 2.5lb boneless pork shoulder (I've made this with bone-in too. If you use boneless, tie up loose pieces)
1 small onion, chopped
1 clove of garlic, minced
Salt and pepper
2 tbsp olive oil
1 small pat of butter
1 28oz + 1 14oz can of crushed tomatoes (San Marzano the best for this)
1 cup red wine
5 sprigs of fresh thyme
5 springs of fresh oregano (use fresh here - it makes a difference)
*Tie the herbs together with kitchen twine so that you can scoop out later.
1. Preheat oven to 325. Liberally salt and pepper the pork. Heat olive oil and butter to dutch oven over medium high and add the pork roast to the pan. Brown on all sides.
2. Add the onion and garlic and saute for 1 minute. If you're using a slow cooker - at this point transfer everything to the cooker along with the rest of the ingredients and cook on high for 5hrs or low for 8hrs. Add the rest of the ingredients, cover and put in the oven.
3. Braise for 3-4 hours or until falling off the bone. When done, remove pork from the pot and shred on large plate or pan. Skim off any oil from the top of the sauce. Add the pork to the sauce and mix well. Serve with pasta and top with parm.
Chicken Saltimbocca
We eat a lot of chicken. Have you noticed? This is one of my all time favorites and it's a great work night dinner since it takes about 15 minutes to make. I usually serve it with asparagus or broccoli or some other kind of green. This is from Food & Wine.
4 chicken breasts, halved or pounded into thin cutlets
10 sage leaves
4 slices of prosciutto
1/2 cup flour
3 tbsp olive oil
4 tbsp butter
1/4 cup dry white wine
1 cup chicken stock
1. Season the chicken with salt and pepper. Place 2-3 sage leaves on each breast and wrap the breast with a slice (or two for full coverage) of prosciutto. The prosciutto should stick together so you shouldn't need a toothpick. Lightly dredge the breasts in flour and shake off the excess.
2. Heat a large skillet to medium high and add oil and 2 tbsp of butter. Cook the chicken until the prosciutto starts to curl - the chicken may not be cooked through - you'll finish it after next step. Transfer the cooked chicken to a plate.
3. Add the remaining 2 tbsp of butter to the pan, add the win and cook over high until reduced by half. Add the stock and bring to a boil. Cook until reduced by half again.
4. Return the chicken to the pan and cook until chicken is done.
Sunday, September 28, 2014
Autumn Risotto with Carmelized Apples and Fennel
Tis the season! I pulled this from the pile because it was delicious.This comes from Food52 and is bright, citrus-y, and full of flavor. Perfect for a cold fall or winter evening.
Caramelized Apples and Fennel
1 large honeycrisp apple (or really any kind), peeled and chopped
1 fennel bulb, trimmed and chopped
1 tbsp olive oil
1 tbsp butter
1/2 tsp salt
1/4 cup white wine
1. Get the apples/fennel started before starting the risotto. In a large skillet over medium high heat, melt the butter with oil and add the apples and fennel. Add salt and stir. Cook over medium heat for about 20 mins. Keep an eye on them after about 10 mins so they don't get too brown. When tender and the juices have evaporated, deglaze the pan with the wine, scraping up any bits. When wine is almost evaporated, turn heat off and set aside.
Risotto
4 pieces of prosciutto (optional)
1 1/2 cups arborio rice
3 cups apple cider
3 cups chicken broth
1 medium onion, chopped
2 cloves of garlic, minced
1/4 cup white wine
1/2 cup parmesan, grated
1/4 tsp orange zest
1/4 cup goat cheese, crumbled
1/3 cup walnuts, toasted and chopped
2 tbsp parsley, chopped
1tbsp olive oil
1 tbsp butter
1. Add the broth and cider to a saucepan and bring to a low simmer.
2. In a large skillet, heat the olive oil and add the prosciutto. Cook until just crispy. Remove from pan and set aside. Add the onions and garlic and cook until soft.
3. Add the rice and cook for a couple of minutes to toast it with the onions. Add the wine and cook until liquid is just absorbed.
4. Add a ladle of the broth/cider to the rice and cook until just absorbed. Repeat this process, stirring frequently until all of the broth is used and the rice is just tender.
5. When adding the last ladle of liquid, add the caramelized apples/fennel, orange zest, parmesan, and butter. Stir and season with salt and pepper. Add the prosciutto and serve with goat cheese, walnuts and parsley on top.
Sunday, May 25, 2014
Caroline's Stromboli

My dear friend Caroline's little son Wes is battling stage IV neuroblastoma at only 1 1/2 years old. Since the beginning of this incredibly difficult journey, I have admired Caroline courage, grace, humor, and tenacity. More than anything, I am astounded by Caroline's ability keep a level head and take life one day at a time. I was recently down in DC and was able to visit Caro and the family in VA for the day. The two of us escaped for a nice long lunch in the sun and a couple of glasses of champagne. At the end of the afternoon we returned to the house and amidst organizing the three kids, batting practice in the front yard, and preparing for an evening at baseball practice (all while entertaining ME), Caroline whipped up some stromboli. I share this recipe because it's delicious but also because it totally captures Caroline... "Oh, these? I carmelized the onions this morning while everyone was still sleeping..." Enough said.
Pretty much any of these ingredients can be swapped/subbed but I'm staying true to Caro's recipe:
1 pre-made pizza dough
1 package of shredded Italian cheese
1 red onion, caramelized
1 handful of jarred jalapenos, finely chopped
6-8 slices of salami
1-2 cups of blanched and chopped spinach
Red sauce for dipping
1. Preheat the oven to 425
2. Roll out the pizza dough into a rectangle, about 12" by 24." Make sure to use plenty of flour so it doesn't stick to the surface.
3. Sprinkle the cheese evenly over the dough, leaving 1/2" on the left end clean for sealing. Sprinkle the onion, the jalapenos, and the spinach over as well. Top with slices of salami. It should look like a big square pizza.
4. Starting on the right/short side, gently start to roll the dough from right to left. Roll as tightly as you can. When you get it all rolled up, seal the long end to the roll and seal the short ends so nothing oozes out while baking.
5. Place carefully on a baking sheet (you might need an extra set of hands), sealed side down. Bake for about 30-40 mins or until the crust is browned and the insides are melted.
6. When stromboli is done, remove from the oven and let sit for about 5-10 mins before cutting. Serve with tomato sauce on the side for dipping.
Saturday, February 15, 2014
Bruschetta

1 baguette
1 container of cherry tomatoes, quartered
1 bunch of basil
1/4 cup olive oil
3 cloves of garlic, grated
2-3 tbsp balsamic vinegar
Salt and pepper
1. Warm the olive oil on medium low heat in a saucepan with the garlic. Let the garlic infuse the oil but be careful not to let it burn.
2. Add the tomatoes to a bowl and pour the oil over them. Add the vinegar, salt and pepper.
3. Slice the baguette into thin slices and arrange on a baking sheet. Broil until lightly toasted, turn over and toast the other side.
4. Add the basil to the tomato mixture and mix well. Pile on top of the toasts and away you go!
Thursday, November 14, 2013
Spicy Sausage Soup
This is one of those recipes that shouldn't even be a recipe. Empty out the crisper drawer in your refrigerator and cover your eyes and pick about 4-5 spices from the cabinet...there's a whole lot of everything in this soup so a substitute here and there definitely won't kill it. It's a great soup for the winter - hearty, full of veggies and with a little heat. It's one of Paddy's favs.
PS - more soup recipes coming soon!!
1 package of ground spicy Italian sausage - remove from casings
1 carrot, diced
1 celery stalk, diced
1 onion, diced
3 cloves of garlic, minced
1 handful of cremini mushrooms, diced
1 zucchini, diced
1 tbsp chili powder
1 tsp cumin
1 tsp coriander
1 tsp oregano
1 tsp red pepper flakes
1/4 cup fresh basil, chopped
1/2 small can of tomato paste
1 14 oz can of fire-roasted tomatoes
1 can chick peas, drained
4 cups chicken broth
1 cup pasta, shells work well
1. Saute the sausage in a dutch oven until completely cooked. Break down into small pieces. Remove from pot and drain most of the fat.
2. Add the carrot, onion, garlic, mushrooms and zucchini and saute until tender.
3. Add the spices and mix well with the vegetables. Add tomato paste and mix well.
4. Add the tomatoes, broth, and sausage and bring to a boil.
5. Add the shells and cook until tender.
Serve with grated Parmesan.
Friday, September 13, 2013
Vegetable Risotto with Poached Eggs

People think that risotto is hard to make or that it takes a really long time. It doesn't. And it's a nice change from pasta and not as heavy as you'd think if you make it with some nice, fresh veggies.
4 cups chicken broth
1 tbsp butter
2 tbsp olive oil
1 leek, white part thinly sliced
1 fennel bulb, chopped
2 cloves garlic, minced
1 cup shitake mushrooms, thinly sliced
1 zucchini, quartered and sliced
1 yellow squash, quartered and sliced
1 cup arborio rice
1/2 cup dry white wine
1 cup peas
1/2 cup fresh basil, chopped
(or any vegetables that you want to use!)
3/4 cup grated Romano or Parmesan cheese
1 tbsp white vinegar
2 eggs
1. In a medium saucepan, heat the broth over medium-high heat and keep hot on the stove.
2. In a large skillet over medium-high heat, add the butter and oil. When hot, add the leeks, fennel, zucchini and squash and cook until soft. Add the mushrooms and garlic and cook until mushrooms are soft.
3. Add the rice and cook for 2 minutes, stirring occasionally so that the rice toasts a little. Add the wine and let simmer and reduce until mostly absorbed/evaporated.
4.Add a ladle of chicken broth and stir occasionally, until almost all liquid is absorbed. Then add another ladle of broth, stir until absorbed, and add more. Continue this process until all broth has been added and all has been absorbed. It should take about 20 minutes or so.
5. Add the peas.
6. Heat about 2 inches of water in a medium saucepan until it boils. Turn down to medium or a veeeery gentle simmer. Add the vinegar. Working with one egg at a time - if you have a small ramekin, crack the egg into the ramekin and then gently transfer egg to water (the ramekin will help the egg stay together). If you don't have one, very gently crack the egg into the water. Let them sit still for about 2 1/2 minutes. Transfer the egg to a plate with a paper towel.
7. Add the cheese to the risotto, give it one last stir and serve with poached egg on top.
Sunday, March 3, 2013
Butternut Squash Ravioli - The Easy Way!
When I make pasta, it's an all day affair that usually ends with my kitchen looking like it was just flour bombed. It's an intense, messy job but always worth it once you get to eat it. I make huge batches and freeze it so that the enjoyment at least lasts for a few months.
But sometimes I want it without the hassle, and wontons are are a great way to make ravioli. Wonton ravioli are quite a bit lighter and much better with a veggie filling and a light sauce because they don't hold up too well in your usual tomato sauce. This is from Cooking Light a few months ago and is a great way to use leftover butternut squash (have you ever noticed that when you buy butternut squash you have way too much of it?). These ravioli are best with fresh baby spinach pesto. These will melt in your mouth!
1 butternut squash, cut into 1 inch pieces
1 tbsp fresh oregano
2 tbsp butter, melted
1 cup of grated parmesan, divided
salt & pepper
1 package of wonton wrappers (found near tofu in grocery store)
1 egg, beaten
1. Preheat oven to 400. Place squash on cookie sheet, drizzle with olive oil and season with salt and pepper. Bake for 20 minutes or until the squash is tender.
2. Remove squash from oven and mash. Add the oregano, butter, and cheese.
3. Moisten 1/2 the edge of the wonton with egg and place 1 1/2 tsp of squash in the middle of the wonton. Fold over and seal. Place wontons on a cookie sheet lined with wax or parchment paper as you finish the rest.
4. Bring a large pot of water to a boil. Carefully place the ravioli in the pot and cook for about 3 minutes. Drain and carefully mix with pesto, a brown butter and sage sauce or a drizzle of olive oil to finish.
*These freeze well! Make a big batch and store in a large tupperware container - just be sure to place parchment between each layer so they don't stick to each other. Put them in boiling water straight from the freezer - they're better if you don't thaw.
Baby Spinach and Basil Pesto
I love pesto - there's so much you can do with it! It's great on sandwiches, as a condiment with steamed or grilled vegetables, as a soup flavor finesser, with eggs, on pizza...the list goes on. But sometimes I find traditional pesto a little intense...which lead me to this baby spinach version which I actually prefer now. The spinach lightens it up a little and actually gives the pesto much more volume - you get so much more!
*Note to chef - my recipe here does not include garlic, by the way. I find raw garlic a little overpowering which seriously disappoints my dear husband who eats garlic cloves as a snack. I smell like it for days so, no thanks. Feel free to add it. Also several other variations noted below.
Easy to double this recipe - it freezes well. Freeze in a container or in an ice cube tray for easy re-use!
1 1/2 cups baby spinach
1/2 cup fresh basil
1/4 cup walnuts, toasted (substitute pine nuts)
1/2 cup grated Parmesan or finely shredded Romano, Asiago or any other Italian hard cheese
2 tbsp olive oil
2 tbsp veggie or chicken broth
1. Place the nuts in a pan on the stove top and heat on medium high, turning occasionally, until they are browned slightly and are fragrant. Remove from heat.
2. Place the spinach, basil, nuts, cheese, and garlic in a food processor.
3. Combine the broth and olive oil in glass or measuring cup. Pulse the ingredients while drizzling the broth/oil through the food chute.
Monday, October 8, 2012
Pasta and Light Tomato Sauce
I had no idea what to call this. But it's a take on one of Lidia B's pasta dishes and became our favorite pasta dish this summer. Paddy's favorite dinner is pasta and red sauce but sometimes that red sauce gets a little heavy and hot in the summer. So, I lightened it up with some fresh tomatoes instead. This is incredibly easy and it's done in the time that it takes to boil the pasta - a great go-to!
Handful of spaghetti, linguini, angel hair
Olive oil
2 cloves of garlic, sliced
1-2 tsp of crushed red pepper
4 medium tomatoes, diced (5 or 6 romas) - roma tomatoes work best but any tomato will do!
1 heaping tablespoon of capers (optional but good!)
1/4 cup of black olives if you have them (cured, black olives the best)
Fresh basil
Shredded asiago, romano or parmesan
1. Boil the water with a good bit of salt. Throw in the pasta.
2. In a large saucepan, heat enough olive oil to cover the pan (2 tbsp -ish) on medium.
3. Throw in the garlic and crushed red pepper. Let it simmer for a minute but don't let the garlic burn.
4. Add the diced tomatoes and their juice and the capers and olives. Add a pinch of salt, if you're using olives and capers, you won't need too much.
5. Turn the heat up to medium high and bring to a simmer. Simmer until the tomatoes get nice and soft (about the time it will take to cook the pasta). Add 1/4 cup of pasta water as the sauce cooks down - you'll probably need to do this about twice.
6. Using tongs, take the spaghetti out of the water - you'll want a little bit of the water so no need to strain. Put the pasta in the pan and mix together with the sauce.
7. Top with chopped basil and cheese.
Friday, March 23, 2012
Deep Dish Pizza - the BEST yet?

Enter cast iron pizza making. I saw this in a Bon Appetit and then looked it up again tonight. I've never been one for a deep dish pizza, I prefer thin and crispy - cracker-like. But this...this is something else. You start with the cast iron pan, then embark on some interesting oven techniques. And what will really throw you off - the always backward Chicago style toppings. Cheese first, sauce last. Turns my world upside down. The result is the crispiest pizza ever with zero clean-up. I mean, none. Pan goes straight back in the cupboard. You must try this...
Here's what you need:
1 store bought pizza dough (that's right - buy it). Leave it out all day at room temp so that it rises and gets to room temp.
Cheeses - I used packaged deli-sliced fontina and provolone and a layer of grated romano. perfect.
Crushed canned tomato - drain for 10 mins or so in a strainer
Meat - I used precooked, ground Italian sausage (I don't recommend veggies for this style of pizza)
*Ingredients depend on how much pizza you're making and how big your pan is. 1 store-bought pizza dough fits a standard, large cast iron pan well.
1. Oil your cast-iron pan with olive oil so that there a good layer on the bottom and the sides of the pan.
2. Gently roll out your dough just bigger than the circumference of the pan. Lay in the pan and push the extra up around the edges of the pan. This is important to hold all of the next layers in like a pie.
3. Place a layer of each cheese on the dough.
4. Lay your meats. Sausage pepperoni, etc. should come now.
5. The crushed tomatoes comes last. A good layer will do, depending on preference.
6. Put the pizza/pan in a cold oven, middle rack, and turn oven on to 500F.
7. Once the oven finishes preheating and reaches 500, turn the oven down to 400 and bake for another 30 minutes.
8. Take the pizza out and let sit for a minute or two. Use a spatula and pull the pizza out of the pan - there should be no sticking at all. Slice it up and ENJOY!!
Sunday, February 26, 2012
Veggie Lasagne
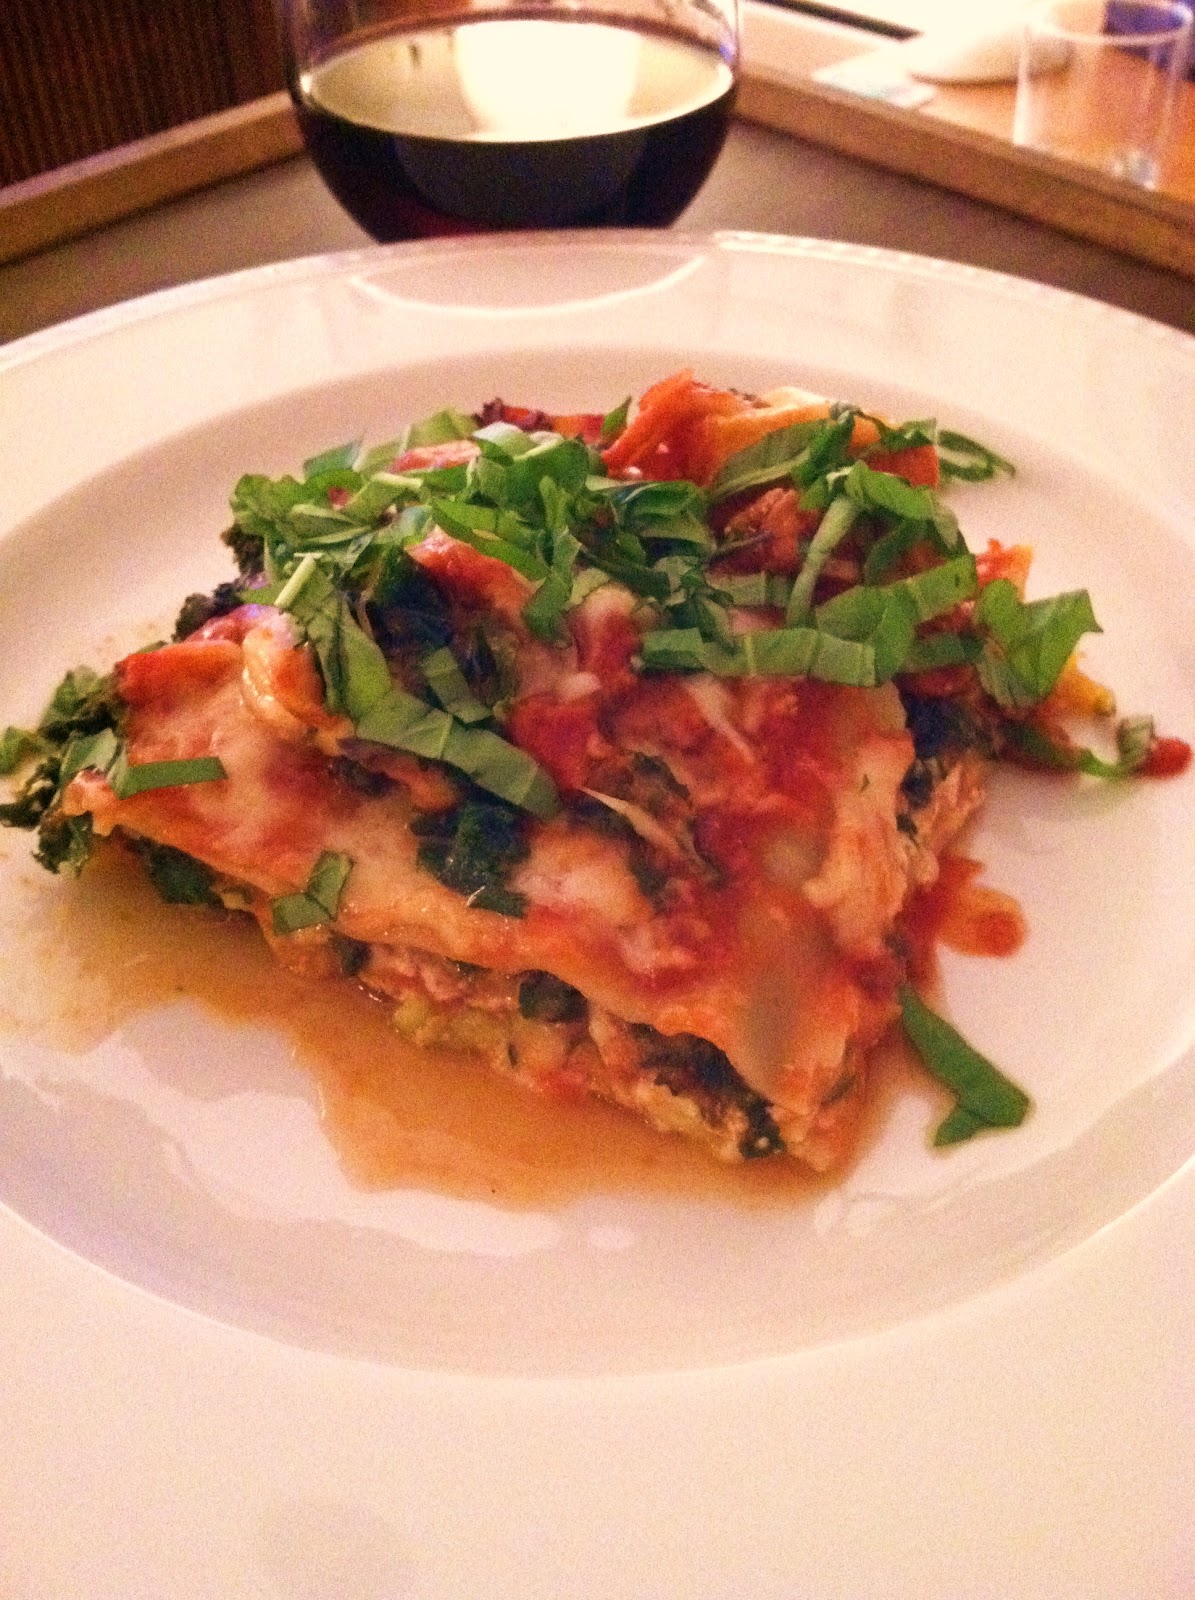
I think lasagne is my all time favorite comfort food. It's the kind of food that just makes me go aaaaaahhhh. The layers of flavors and the cheeeese. Of course, the cheese. We used to have it a lot growing up and then my mom started adding grated vegetables. This is a take on hers. She always included shredded carrots which give it a nice sweetness. It's one of those meals that's different every time, depending on what you've got in your fridge. I'll include some suggestions for variations below. But overall, the zucchini and mushrooms in this give it one more dimension - and make it taste a little lighter.
4-5 cups of tomato sauce - (just cause it's a veggie lasagne doesn't mean you can't have meat. Add some ground sausage to your sauce for even more flavor)
1 package of no-boil lasagne noodles
1 big or 2 small zucchinis - grated and squeezed thoroughly through cheesecloth or papertowel
1 box of baby bella mushrooms - finely chopped
1 small container ricotta - you can make your own! (sometimes I like to add goat cheese)
1 egg, beaten
1 package of shredded Italian cheese (or sliced fontina, provolone, fresh mozzarella)
1 cup fresh basil, roughly chopped
1. Preheat oven to 350.
2. Mix the ricotta with the beaten egg in a small bowl. Add a bit of salt and pepper and half a cup of the fresh basil.
3. In a large rectangular baking dish, ladle enough sauce so that it coats the bottom. Arrange one layer of the dried noodles across the dish.
4. Add a layer of ricotta over the noodles and spread so that it reaches all corners and edges. Add all of the shredded zucchini and then press down lightly with your hands. Add some more tomato sauce - just sprinkle it over the zucc. It doesn't have to cover it all or be perfect.
5. Add another layer of noodles and some more ricotta. Sprinkle all of the mushrooms. Add some shredded cheese or sliced provolone or fontina if you're using that instead.
6. Add another layer of noodles. Depending on how deep your dish is, you can repeat another layer of cheese and sauce. You should layer until your lasagne is even with the top of the dish. For the final layer, ladle enough sauce over the top so that the noodles are covered. Top with fresh mozzarella or other shredded cheese.
7. Tent tin foil over the lasagne to completely cover and seal it - but try not to let it tough the top or all of your cheese will come off with the foil when it's done baking. Put the dish on a cookie sheet and into the oven for 1 hour.
8. After an hour, take the foil off and cook for another 15 minutes until the cheese bubbles and is golden.
Sprinkle with the rest of the basil and enjoy!!
Sunday, December 4, 2011
Zuppa Gallurese (Cheesy Bread Soup!)
I've been watching a lot of Lidia's Italy on PBS lately - she's my new favorite. No frills or fancy airbrushed camera shots, just really good food. I saw her make this a while ago and although I was a little unsure about the cabbage, once she took it out of the oven and took a bite - I was dying for it. Soooo ooey gooey and cheesy. When I made it a couple of weeks later, it was as good as I hoped. This is not the healthiest meal and you do have to be a cheese lover...
12 slices of whole wheat country bread, cut 1/2 thick
1/4 tsp salt
1 head Savoy cabbage
2 TB olive oil
1 lb provolone (have the deli cut it in extra thick slices - 1/4 to 1/3 inch thick)
1 TB soft butter
1/2 cup grated romano
4 cups chicken or vegetable stock
1. Preheat the oven to 400 degrees.
2. Trim the crusts from the bread and lay them flat on a baking sheet in the oven as it heats. Toast the slices, turn them over once. Remove and let cool and let the oven continue to preheat.
3. Slice the cabbage head in half and cut out the core so the leaves can separate. Lay the halves cut side down and slice into 1 inch strips. Drop them into a large pot of salted boiling water. Cook 10-15 minutes or until tender.
4. When the cabbage is done, drain them in a colander and rinse under cool water. Let drain and put them in a bowl, drizzle with olive oil and a touch of salt. Toss well.
5. Butter the sides and bottom of a deep baking dish. Add a layer of bread to cover the bottom of the dish. Spread half of the cabbage in a layer over the bread. Lay all of the provolone on top of the cabbage in a single layer. Sprinkle half of the grated cheese. Spread the remaining cabbage and top it with another layer of bread. (If the bread is over the edge of the dish, press down to compress the layers a bit)
6. Slowly pour the stock all over the bread so that everything is moistened. Sprinkle the rest of the cheese over the top.
7. Tent the dish with aluminum foil and place the dish on a baking sheet. Bake for 45 minutes until the juices are bubbling. Remove foil and bake for another 20 minutes until the top is brown all over.
Thursday, August 25, 2011
Cheesy Baked Pesto Pasta & Tomato
I was feeling totally uninspired the other night. I'd forgotten to take the chicken out of the freezer and didn't know what to have. This turned out to be a new favorite and I think it'll be reappearing in our kitchen a lot from now on.
1/2 box of penne or rigatoni
1/4 to 1/3 cup pesto
1/2 small container of ricotta
1-2 large fresh tomatoes - thickly sliced
Shredded parmesan
Shredded asiago - really needed for the extra flavor (and a good one to have on hand in the fridge anyway!)
1. Preheat the oven to 400 degrees.
2. Cook the pasta until just al dente - it'll cook more in the oven so not too tender! Save 1 cup of pasta water and drain the pasta.
3. Put the pasta in a large bowl and add the pesto. Mix well. Add a little pasta water at a time to help it incorporate and cover the pasta. Add the ricotta and mix well. Salt and pepper to taste.
4. Pour the pasta mixture into an oiled/sprayed baking dish.
5. Place the sliced tomatoes on top and generally cover the top with both cheeses.
6. Place in the oven uncovered until the cheese is brown and bubbly on top.
Sunday, July 31, 2011
Ricotta and Pea Ravioli - The Easy Way!!
Ok, so I'm back. Now that the wedding has come and gone, I can sink my teeth back into searching for new and fun stuff to make. I tend to be a little less inspired in the summer, which is ironic considering that this is when food is at its best. But we do a lot of grilling and get stuck into our routine of grilled meat, corn and salad most nights. But, we were dying for some pasta the other night. Temps were down to a chilly 80 so we figured we could do it. Not wanting the usual sausage and heavy pasta, I opted for this VERY light summer pasta dish. It's delicious and easy. The best part is that given the heat, I wasn't up for cranking out the fresh pasta this week. Instead - wonton wrappers. If you really feel like you're cheating - use your own homemade ricotta and that will make up for it.
1 package wonton wrappers - found in the tofu section of the grocery store
2/3 of a small container of ricotta cheese (much better if you make your own!!)
1 cup frozen peas
1 egg
1/2 cup grated parmesan or romano - grate your own, you want it fresh!
1 TB lemon zest
2 TB chopped basil
salt & pepper
tomato sauce (however you like it)
1. Have your tomato sauce ready and hot
2. Beat the egg. Reserve a spoonful or so in a small bowl and add a touch of water to make an eggwash to seal your ravioli. Set both aside.
3. Soak the peas in some warm water to defrost, then drain.
4. In a food processor, pulse the peas and basil until a sort of a meal is formed.
5. In a bowl, combine the ricotta, the beaten egg (not the spoonful with water), the parmesan, lemon zest, salt and pepper. Mix together and then add the peas. Mix well together.
6. Place about 1 tsp into the center of the wonton. Fold the edges to form a triangle and seal with the egg wash. Repeat until all of the filling is used, placing them on a cookie sheet.
Note: do not overfill them! It takes a little patience but if they're overloaded, they won't stay sealed! Also, this makes quite a few. You can freeze them raw, layer them in a tupperware container with parchment in between each layer. You can pop them into boiling water frozen and makes for an easy and convenient dinner.
7. Boil a pot of water. Add the ravioli one at a time and very gently check to make sure they don't stick to the bottom of the pot. Ravioli are usually done when they float to the top but they'll take a little over 5 minutes or so.
8. Carefully spoon them out onto a place and top with tomato sauce.
Saturday, March 6, 2010
Eggplant Parmesan Rolls with Swiss Chard
This is eggplant parmesan without the frying and breadcrumbs. I made it the other night for the first time and it was delicious. A nice alternative to lasagna...
2 medium eggplants, trimmed and cut lengthwise into 1/4 slides (use a mandolin if you have one)
Salt
Olive oil
1lb bunch of swiss chard, center ribs removed
2 large eggs
1 15oz container of ricotta
1 3/4 cups grated parmesan
1 15-16oz can of tomato sauce
1 8oz ball of water packed mozzarella, thinly sliced into discs
1. Layer the eggplant slices in a colander, sprinkling each layer with a generous amount of salt. Place over a bowl for 30-60 minutes. The salt will sweat the water out of the eggplant.
2. Wipe the eggplant slices with a damp paper towel to remove the salt. Then dry well with dry paper towels.
3. Turn on the oven broiler to medium high. Line 2 cookie sheets with parchment and lay the slices in one layer. Brush with olive oil and broil one sheet at a time for 3-4 minutes per side or until the eggplant slices are slightly browned on each side. Remove from oven and let cool.
Turn the oven on to 350.
4. Bring a large pot of water to a boil. Add chard and boil until just tender, about 2 minutes. Drain, rinse with cold water. Squeeze chard dry and squeeze again through a paper towel until very dry. Chop until in small pieces.
5. In a medium sized bowl, whisk eggs and mix in ricotta with a pinch of salt. Stir in chopped chard and 1 cup of parmesan.
6. In a large baking dish, pour enough tomato sauce to lightly coat bottom. Taking one piece of eggplant at a time on a clean surface, spoon some of the cheese mixture into the middle of the eggplant and roll up enclosing the filling. Place in the dish, seam side down until all eggplant slices are used.
7. Spoon the rest of the sauce on top of the eggplant rolls and place the mozzarella on top. Scatter the parmesan on top. Cover with tin foil and bake for about 30 minutes. Remove foil and cook until cheese bubbles.
Saturday, May 23, 2009
Summer Pasta
I love pasta, but red sauce is sometimes a little too much in the hot summer. This is a nice and light pasta dish with lots of room for fresh veggies. I prefer to use asparagus and love to add swish chard if I have it - it's a great alternative to spinach - you get the good vitamins and it holds up a little more in the hotness of the food. I like to use penne or rotini or some kind of pasta that can catch the ricotta.
Pasta - whatever kind you like, penne or rotini are good with this
2 tbsp olive oil
2 spicy chicken sausages
Handful of asparagus
2-3 shallots, chopped
4-5 baby bella mushrooms, quartered
1/4 cup white wine
1/4 cup chicken broth
1/3 cup ricotta cheese
1/4 cup fresh basil, chopped
2 cups swiss chard or kale, chopped, and if you have it
Salt and pepper
1. Start the pasta.
2. In a large pan (use one with deep sides if you have one), heat the olive oil on medium heat and add the sausage - cook until done.
3. When the sausage is done, remove from the pan and set aside. Add the asparagus to the pan and cook until just tender. When done, remove from heat and set aside with the sausage.
4. Add the shallots and garlic and mushrooms and cook until just soft. Don't burn the garlic.
5. Turn heat to medium high and add the wine and broth, scrape the bottom of the pan to get all the bits up. Simmer until reduced to half.
6. While liquid is simmering, chop the sausage into small pieces and chop the asparagus into bit sized pieces.
7. Add the swiss chard to the pan and stir until soft. Add the sausage and asparagus.
8. When pasta is done, set aside about a cup of pasta water and drain the pasta. Add the pasta to the pan and mix with the sausage and vegetables.There should be enough juice so that everything is well coated but you don't really want juice at the bottom of the pan. If it seems a little dry, add some of the water from the pasta.
8. Add the ricotta and mix until everything has a little ricotta on it. Again, you might want to add a little pasta water to help the ricotta mix in with the rest of the ingredients but be careful not to make it watery. If it is, just simmer until the water evaporates.
9. Add the basil, mix well again and it's ready to eat!
*good with a little grated romano on top.
Tuesday, March 31, 2009
Shrimp Scampi - in 15 minutes!
This is as easy as it gets. An Italian restaurant in your own kitchen. So go out and buy 1 lb of shrimp at the grocery store and make yourself a very easy meal.
4 tbsp butter
4 tbsp olive oil
2 shallots, finely chopped
2 cloves garlic, finely chopped
1 tbsp red pepper flakes (less if you don't want the spice)
1 lb shrimp (tails on or off)
1/2 cup dry white wine (or whatever you have in the fridge)
1 lemon, juiced
1/4 cup parsley
salt and pepper to taste
pasta - spaghetti or rotini or whatever you like.
*Pasta will take about 8-10 minutes or more, so start this before the shrimp.
1. In a large skillet, melt 2 tbsp butter over medium heat.
2. Add shallots and red pepper.
3. Season shrimp with salt and pepper and drop in skillet. Cook until pink (be careful not to overcook!!). Remove shrimp from heat.
4. Add wine and lemon juice to skillet and bring to boil.
5. Add 2 tbsp butter and olive oil.
6. When butter's melted, return shrimp to pan with parsley.
7. Drain pasta. Serve with shrimp and sauce.
Subscribe to:
Posts (Atom)